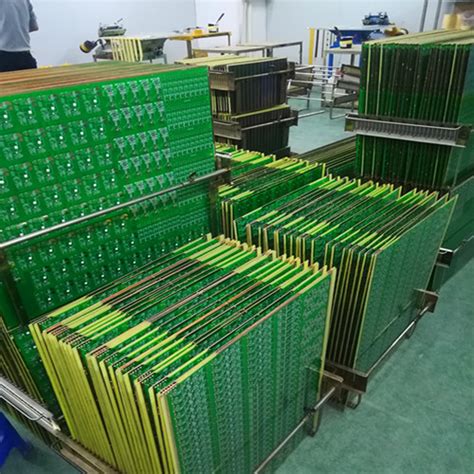
What is PCB Silk-screen?
PCB silk-screen, also known as legend or nomenclature, is the process of printing text, logos, or symbols onto the surface of a printed circuit board (PCB). This is typically done using a screen printing method, where ink is forced through a fine mesh screen onto the PCB surface. The silk-screen layer serves several important purposes:
- Component identification: Silk-screen labels components and their orientation, making it easier for assembly and troubleshooting.
- Branding: Company logos, product names, and version numbers can be printed for branding and identification.
- Instructions and warnings: Important instructions or warnings can be conveyed to users.
- Aesthetics: Silk-screen can enhance the visual appearance and professionalism of the PCB.
Silk-screen Ink Composition
The ink used for PCB silk-screening is typically a thermoset polymer that cures (hardens) when exposed to heat. Common ink types include:
- Epoxy-based: Durable and resistant to chemicals and abrasion.
- Acrylic-based: Lower cost and easier to work with, but less durable than epoxy.
- UV-curable: Cures quickly when exposed to ultraviolet light, allowing for faster production.
The ink also contains pigments for color, with white being the most common. Other colors like black, yellow, and red are also used.
Silk-screen Mesh and Resolution
The resolution and quality of the silk-screen depend on the mesh of the screen. The mesh refers to the number of openings per linear inch. Higher mesh counts result in finer details and improved resolution.
| Mesh Count | Minimum Line Width | Minimum Text Height |
|---|---|---|
| 80-100 | 0.3 mm (12 mil) | 2.0 mm (80 mil) |
| 120-140 | 0.2 mm (8 mil) | 1.5 mm (60 mil) |
| 180-200 | 0.1 mm (4 mil) | 1.0 mm (40 mil) |
For most PCB Applications, a mesh count of 120-140 provides a good balance of resolution and ease of printing.
Silk-screen Application Process
The process of applying silk-screen to a PCB involves several steps:
-
Artwork Preparation: The silk-screen artwork is created using PCB Design software. The artwork must be properly sized and positioned, with appropriate line widths and text sizes.
-
Screen Preparation: A fine mesh screen is coated with a light-sensitive emulsion and exposed to UV light through the artwork. The exposed areas harden, while the unexposed areas remain soft and are washed away, leaving an open mesh pattern corresponding to the artwork.
-
Ink Application: The screen is placed over the PCB and ink is applied to the top of the screen. A squeegee is used to force the ink through the open mesh areas onto the PCB surface.
-
Curing: After printing, the ink must be cured to harden and adhere to the PCB. This is typically done by exposing the PCB to elevated temperatures in an oven. Curing temperatures and times vary depending on the ink type.
-
Inspection: After curing, the silk-screen is inspected for proper alignment, legibility, and defects. Any defective boards are reworked or scrapped.
Design Considerations for Silk-screen
When designing silk-screen artwork, several factors must be considered to ensure good print quality and legibility:
-
Minimum line width and spacing: The silk-screen mesh and ink type dictate the minimum achievable line width and spacing. Trying to print lines that are too thin or too close together can result in poor print quality or bridging between lines.
-
Text size and font: Text should be large enough to be easily readable. A minimum text height of 1.5 mm (60 mil) is recommended for most applications. Sans-serif fonts like Arial or Helvetica are preferred for legibility.
-
Orientation and placement: Silk-screen should be oriented to be easily readable when the PCB is installed in its final application. Avoid placing silk-screen over pads or other components that could interfere with soldering.
-
Color contrast: There should be sufficient contrast between the silk-screen color and the PCB substrate color to ensure good legibility. White ink on a green solder mask is the most common combination.
Silk-screen Curing Process
After the silk-screen ink is applied to the PCB, it must be cured to harden and adhere to the surface. The curing process involves exposing the PCB to elevated temperatures for a specific time period. The curing temperature and time depend on the type of ink used.
Curing Methods
There are two primary methods for curing silk-screen ink:
-
Convection Oven Curing: The PCBs are placed in a convection oven and heated to the required temperature for a specified time. Typical curing temperatures range from 120°C to 150°C (248°F to 302°F), with curing times of 30 to 60 minutes.
-
Infrared (IR) Curing: The PCBs are passed through an IR oven, which uses infrared radiation to quickly heat the ink. IR curing is faster than convection oven curing, with typical curing times of 5 to 10 minutes. However, IR ovens are more expensive and can cause uneven heating if not properly controlled.
Curing Profile
The curing profile refers to the temperature and time cycle used to cure the ink. A typical curing profile consists of three stages:
-
Preheat: The PCB is gradually heated to the curing temperature to avoid thermal shock and ensure even heating.
-
Soak: The PCB is held at the curing temperature for a specified time to allow the ink to fully cure.
-
Cool Down: The PCB is gradually cooled back to room temperature to avoid thermal stress.
The specific curing profile depends on the ink type and PCB substrate material. Ink manufacturers provide recommended curing profiles for their products.
| Ink Type | Curing Temperature | Curing Time |
|---|---|---|
| Epoxy | 150°C (302°F) | 30-60 minutes |
| Acrylic | 120°C (248°F) | 30-60 minutes |
| UV-curable | Room Temperature | 5-30 seconds |
Curing Challenges and Considerations
Several challenges and considerations must be taken into account when curing silk-screen ink:
-
Temperature Control: The curing temperature must be carefully controlled to ensure complete curing without damaging the PCB or components. Overheating can cause discoloration, warping, or delamination of the PCB.
-
Thermal Expansion: The PCB and ink expand when heated and contract when cooled. This can cause stress on the ink and lead to cracking or delamination if not properly controlled.
-
Contamination: Contaminants on the PCB surface or in the ink can interfere with proper curing and adhesion. Proper cleaning and handling procedures must be followed to avoid contamination.
-
Compatibility: The curing process must be compatible with the PCB substrate material and any components already mounted on the board. Some components may be sensitive to high temperatures.

Silk-screen Defects and Troubleshooting
Several defects can occur during the silk-screen process, affecting the quality and legibility of the printed artwork. Common defects include:
-
Incomplete or Missing Print: Caused by clogged mesh, insufficient ink, or incorrect screen positioning.
-
Smearing or Blurring: Caused by excessive ink, incorrect squeegee pressure or angle, or improper curing.
-
Ink Spreading or Bleeding: Caused by incorrect mesh size, ink viscosity, or curing temperature.
-
Poor Adhesion: Caused by contamination, incompatible ink or substrate, or incorrect curing.
-
Discoloration or Fading: Caused by incorrect ink type, overheating during curing, or exposure to UV light or chemicals.
Troubleshooting silk-screen defects involves identifying the root cause and making appropriate adjustments to the process. This may include:
- Adjusting the screen mesh, ink type, or squeegee pressure.
- Cleaning the screen or PCB surface to remove contaminants.
- Modifying the curing profile or temperature.
- Changing the artwork design to improve printability.
Proper process control and quality assurance procedures can help prevent defects and ensure consistent silk-screen quality.
Silk-screen Testing and Quality Control
To ensure consistent quality and performance of silk-screened PCBs, various testing and quality control methods are used. These include:
-
Visual Inspection: The silk-screen is visually inspected for legibility, alignment, and defects. This may be done manually or using automated optical inspection (AOI) systems.
-
Adhesion Testing: The adhesion of the ink to the PCB surface is tested using a tape test or scratch test. The ink should remain adhered to the surface without flaking or peeling.
-
Durability Testing: The durability of the ink is tested by exposing the PCB to various environmental conditions, such as high temperature, humidity, or chemicals. The ink should maintain its legibility and adhesion.
-
Dimensional Verification: The dimensions of the printed artwork, such as line widths and text sizes, are measured using optical measurement systems to ensure they meet specifications.
-
Electrical Testing: For PCBs with conductive silk-screen, such as those used for shielding or grounding, electrical continuity and resistance are tested to ensure proper functionality.
Quality control procedures should be implemented throughout the silk-screen process, from artwork design to final inspection. This may include:
- Implementing statistical process control (SPC) to monitor and control key process parameters.
- Conducting regular audits and inspections to identify and correct any issues.
- Providing training and certification for operators to ensure consistent performance.
- Documenting and tracking defects and customer complaints for continuous improvement.
By implementing effective testing and quality control measures, PCB Manufacturers can ensure that their silk-screened products meet customer requirements and industry standards.
Frequently Asked Questions (FAQ)
-
What is the purpose of silk-screen on a PCB?
Silk-screen is used to print text, logos, and symbols onto the PCB surface for component identification, branding, instructions, and aesthetics. -
What types of ink are used for PCB silk-screening?
Common ink types include epoxy-based, acrylic-based, and UV-curable inks. Epoxy-based inks are the most durable, while UV-curable inks offer the fastest curing times. -
What is the minimum text size that can be printed using silk-screen?
The minimum text size depends on the screen mesh and ink type, but a minimum text height of 1.5 mm (60 mil) is recommended for most applications. -
How is silk-screen ink cured after printing?
Silk-screen ink is typically cured by exposing the PCB to elevated temperatures (120°C to 150°C) for 30 to 60 minutes in a convection oven. UV-curable inks can be cured using UV light in a matter of seconds. -
What can cause poor adhesion of silk-screen ink to the PCB surface?
Poor adhesion can be caused by contamination on the PCB surface, incompatible ink or substrate materials, or incorrect curing temperature or time. Proper cleaning and process control can help prevent adhesion issues.


Leave a Reply