Introduction
Printed circuit boards (PCBs) are essential components in virtually all modern electronic devices. Over time, PCBs can accumulate dust, dirt, flux residue, and other contaminants that can degrade their performance and shorten their lifespan. Properly cleaning and maintaining your PCBs is crucial to ensure optimal functionality and durability.
In this comprehensive guide, we’ll explore the various methods and best practices for PCB Cleaning. We’ll cover the types of contaminants that can affect your PCBs, the cleaning solutions and tools available, and step-by-step instructions for achieving a spotless and long-lasting PCB.
Understanding PCB Contaminants
Before we dive into the cleaning process, it’s essential to understand the types of contaminants that can accumulate on your PCBs. The most common PCB contaminants include:
- Dust and dirt
- Flux residue
- Oils and greases
- Soldering debris
- Corrosion
- Fingerprints
Each of these contaminants can have different effects on your PCB’s performance and longevity. For example, dust and dirt can cause short circuits, while flux residue can lead to corrosion and poor solderability. Understanding the nature of these contaminants will help you choose the most effective cleaning methods and solutions.

PCB Cleaning Solutions
There are several types of cleaning solutions available for PCBs, each with its own advantages and disadvantages. The most common PCB cleaning solutions include:
| Cleaning Solution | Advantages | Disadvantages |
|---|---|---|
| Isopropyl Alcohol (IPA) | – Effective at removing flux residue and oils – Evaporates quickly – Leaves no residue |
– Flammable – Can damage some plastics |
| Deionized (DI) Water | – Non-toxic – Environmentally friendly – Inexpensive |
– May not remove all contaminants – Can cause corrosion if not dried properly |
| Aqueous Cleaners | – Effective at removing a wide range of contaminants – Non-flammable – Environmentally friendly |
– May require special equipment – Can be expensive |
| Solvent-Based Cleaners | – Effective at removing tough contaminants – Fast-acting |
– Can be toxic and flammable – May damage some components |
When choosing a cleaning solution, consider factors such as the type of contaminants present, the materials used in your PCB, and environmental and safety concerns.

PCB Cleaning Tools
In addition to cleaning solutions, various tools can help you effectively clean your PCBs. Some essential PCB cleaning tools include:
- Brushes: Soft-bristled brushes can help dislodge stubborn contaminants and reach tight spaces.
- Swabs: Cotton or foam swabs are useful for precision cleaning and applying cleaning solutions.
- Lint-free wipes: Use lint-free wipes to avoid leaving fibers on your PCB.
- Compressed air: Canned compressed air can help remove dust and loose debris.
- Ultrasonic cleaners: These devices use high-frequency sound waves to agitate cleaning solutions and remove contaminants.

Step-by-Step PCB Cleaning Process
Now that you’re familiar with the contaminants, cleaning solutions, and tools, let’s walk through the step-by-step process for cleaning your PCB.
Step 1: Preparation
- Ensure your workspace is clean and well-ventilated.
- Gather your cleaning solutions, tools, and personal protective equipment (PPE) such as gloves and safety glasses.
- Disconnect your PCB from any power sources and remove it from its enclosure, if applicable.
Step 2: Dry Cleaning
- Use compressed air to blow off any loose dust and debris from the surface of the PCB.
- Gently brush the PCB with a soft-bristled brush to remove any remaining loose contaminants.
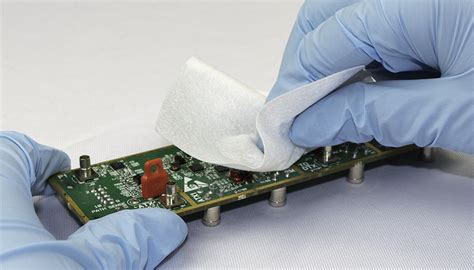
Step 3: Wet Cleaning
- Choose an appropriate cleaning solution based on the type of contaminants present and the materials used in your PCB.
- Apply the cleaning solution to a lint-free wipe or swab, being careful not to oversaturate the PCB.
- Gently wipe the surface of the PCB, paying extra attention to areas with visible contaminants or corrosion.
- Use a clean wipe or swab to remove any remaining cleaning solution and contaminants.
Step 4: Rinsing (if necessary)
- If using an aqueous cleaner or deionized water, rinse the PCB with clean deionized water to remove any remaining cleaning solution.
- Use compressed air or a lint-free wipe to remove excess water from the surface of the PCB.
Step 5: Drying
- Allow the PCB to air dry completely, or use compressed air to accelerate the drying process.
- Ensure the PCB is completely dry before reassembling or powering on the device.
Preventive Maintenance
In addition to regular cleaning, preventive maintenance can help extend the life of your PCBs and reduce the need for frequent cleaning. Some preventive maintenance tips include:
- Store PCBs in a clean, dry environment when not in use.
- Use Conformal Coatings to protect PCBs from moisture, dust, and other contaminants.
- Regularly inspect PCBs for signs of corrosion, damage, or excessive contamination.
- Follow proper handling procedures, such as using ESD-safe tools and wearing gloves to minimize the transfer of oils and other contaminants.
By implementing a regular cleaning and maintenance schedule, you can ensure your PCBs remain in top condition and provide reliable performance for years to come.
Frequently Asked Questions (FAQ)
1. How often should I clean my PCBs?
The frequency of cleaning depends on the environment in which your PCBs operate and the level of contamination they are exposed to. As a general rule, it’s a good idea to clean your PCBs at least once a year, or whenever you notice visible contamination or performance issues.
2. Can I use household cleaners to clean my PCBs?
It’s not recommended to use household cleaners on PCBs, as they may contain harsh chemicals that can damage components or leave residues. Stick to cleaning solutions specifically designed for electronic devices.
3. What should I do if my PCB has severe corrosion?
If your PCB has severe corrosion, it’s best to consult with a professional or consider replacing the affected components. Attempting to clean severe corrosion can sometimes cause further damage to the PCB.
4. Can I use a dishwasher to clean my PCBs?
No, do not use a dishwasher to clean your PCBs. The high temperatures, pressure, and detergents used in dishwashers can damage components and cause irreparable harm to your PCBs.
5. How do I know if my PCB is clean enough?
A clean PCB should be free of visible contaminants, corrosion, and residues. If you’re unsure whether your PCB is sufficiently clean, you can use a magnifying glass or microscope to inspect the surface more closely. Additionally, if your device is functioning properly and not experiencing any performance issues, it’s likely that your PCB is adequately clean.
Conclusion
Regularly cleaning your PCBs is essential for maintaining their performance, reliability, and longevity. By understanding the types of contaminants that can affect your PCBs, choosing the right cleaning solutions and tools, and following a step-by-step cleaning process, you can effectively remove dirt, dust, flux residue, and other harmful substances.
Remember to always handle your PCBs with care, use appropriate personal protective equipment, and follow the manufacturer’s guidelines for cleaning and maintenance. By implementing a regular cleaning and preventive maintenance schedule, you can ensure your PCBs remain in top condition and continue to function optimally for years to come.


Leave a Reply