Introduction to ArduinoMegaScrewshield
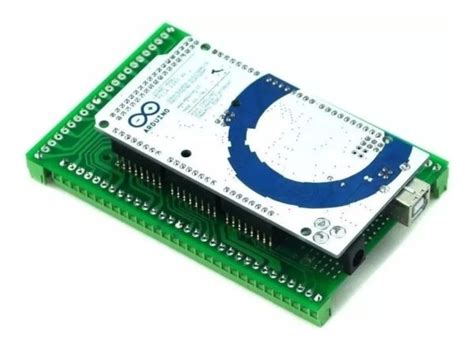
The Arduino Mega Proto Screwshield is a printed circuit board (PCB) designed to simplify the process of connecting external components to an Arduino Mega microcontroller board. This shield provides a convenient way to prototype and create custom circuits without the need for Breadboards or soldering. In this article, we will explore the features, benefits, and applications of the Arduino Mega Proto Screwshield PCB.
What is an Arduino Mega?
Before diving into the details of the ArduinoMegaScrewshield, let’s briefly discuss the Arduino Mega microcontroller board. The Arduino Mega is a powerful and versatile development board based on the ATmega2560 microcontroller. It offers 54 digital input/output pins, 16 analog inputs, 4 UARTs (hardware serial ports), a 16 MHz Crystal Oscillator, a USB connection, a power jack, an ICSP header, and a reset button.
The Arduino Mega is widely used in projects that require a large number of I/O pins or additional memory compared to other Arduino Boards like the Arduino Uno. It is suitable for advanced projects such as robotics, home automation, and interactive installations.
Features of the Arduino Mega Proto Screwshield PCB
The Arduino Mega Proto Screwshield PCB is designed to enhance the functionality and ease of use of the Arduino Mega board. Here are some key features of this shield:
-
Screw Terminals: The shield provides screw terminals for easy and secure connection of external components to the Arduino Mega. These terminals eliminate the need for soldering or using breadboards, making it convenient to connect sensors, actuators, and other peripherals.
-
Prototyping Area: The ArduinoMegaScrewshield PCB includes a prototyping area with a grid of through-holes. This area allows you to add custom circuitry, mount additional components, or create your own breakout boards. The prototyping area provides flexibility and expandability to your projects.
-
Pin Compatibility: The shield is designed to be fully compatible with the Arduino Mega pinout. It provides access to all the digital and analog pins, as well as power and ground connections. This compatibility ensures seamless integration with existing Arduino Mega projects and libraries.
-
Sturdy Construction: The Arduino Mega Proto Screwshield PCB is manufactured using high-quality materials and follows industry standards. The PCB is made of FR-4 glass-reinforced epoxy laminate, which provides excellent durability and electrical insulation. The screw terminals and other components are securely attached to the PCB, ensuring reliable connections.
-
Labeling and Silk Screen: The shield features clear labeling and silk screen printing on the PCB. Each screw terminal is labeled with its corresponding pin number, making it easy to identify and connect the correct pins. The silk screen also includes helpful information such as pin functions and power supply indicators.
Benefits of Using the ArduinoMegaScrewshield
Using the Arduino Mega Proto Screwshield PCB offers several benefits for Arduino Mega-based projects:
-
Simplified Wiring: The screw terminals on the shield simplify the process of connecting external components to the Arduino Mega. Instead of dealing with jumper wires or soldering, you can quickly and securely attach wires to the screw terminals. This saves time and reduces the risk of loose connections or short circuits.
-
Improved Organization: The ArduinoMegaScrewshield helps keep your project organized and tidy. By using screw terminals, you can route the wires neatly and avoid the clutter often associated with breadboards or direct soldering. This organization enhances the overall appearance and maintainability of your project.
-
Rapid Prototyping: The prototyping area on the shield allows for quick and easy experimentation with different circuit designs. You can add custom components, breakout boards, or additional circuitry without modifying the Arduino Mega board itself. This flexibility accelerates the prototyping process and enables faster iteration and refinement of your project.
-
Increased Durability: The screw terminals provide a stable and secure connection compared to breadboards or jumper wires. The sturdy construction of the ArduinoMegaScrewshield PCB ensures that the connections remain intact even in challenging environments or when subject to vibrations. This durability is particularly important for projects that require long-term reliability.
-
Enhanced Scalability: The Arduino Mega Proto Screwshield PCB allows for easy expansion and scalability of your projects. As your project grows and requires additional components or functionality, you can easily add more screw terminals or utilize the prototyping area to accommodate the new requirements. The shield provides a modular approach to building complex systems.
Applications of the ArduinoMegaScrewshield
The Arduino Mega Proto Screwshield PCB finds applications in a wide range of projects and domains. Here are a few examples:
-
Robotics: The shield is commonly used in robotics projects where multiple sensors, actuators, and peripherals need to be connected to the Arduino Mega. The screw terminals provide a convenient way to interface with motors, encoders, servos, and other robotic components. The prototyping area can be used to add custom circuitry for motor drivers, sensor modules, or communication interfaces.
-
Home Automation: Arduino Mega-based home automation projects often require connecting various sensors, relays, and actuators to control lights, appliances, and security systems. The ArduinoMegaScrewshield simplifies the wiring process and allows for easy integration of different components. The screw terminals ensure reliable connections and make it easier to modify or expand the system as needed.
-
Data Acquisition: In data acquisition applications, the Arduino Mega is used to collect data from multiple sensors and devices. The ArduinoMegaScrewshield provides a convenient way to connect these sensors using screw terminals. The shield’s prototyping area can be used to add signal conditioning circuits, amplifiers, or filters to improve the quality of the acquired data.
-
Interactive Installations: Arduino Mega-based interactive installations often involve connecting various input devices, such as buttons, switches, and sensors, as well as output devices like LEDs, displays, and actuators. The ArduinoMegaScrewshield simplifies the wiring process and provides a modular approach to building these installations. The screw terminals enable quick and secure connections, making it easier to set up and maintain the installation.
-
Educational Projects: The Arduino Mega Proto Screwshield PCB is an excellent tool for educational projects and workshops. It allows students and beginners to focus on learning Arduino programming and electronics without the complexity of soldering or breadboarding. The screw terminals provide a user-friendly interface for connecting components, making it easier to explore different circuits and concepts.
Getting Started with the ArduinoMegaScrewshield
To start using the Arduino Mega Proto Screwshield PCB, follow these steps:
- Obtain the Required Components:
- Arduino Mega board
- Arduino Mega Proto Screwshield PCB
- USB cable for programming and power
-
External components (sensors, actuators, etc.) as per your project requirements
-
Mount the Shield:
- Carefully align the Arduino Mega Proto Screwshield PCB with the Arduino Mega board.
- Ensure that all the pins are properly aligned and the shield sits securely on top of the Arduino Mega.
-
Gently press down on the shield to establish a firm connection.
-
Connect External Components:
- Identify the screw terminals corresponding to the desired pins on the Arduino Mega.
- Use a small flathead screwdriver to loosen the screw terminals.
- Insert the wires from your external components into the appropriate screw terminals.
- Tighten the screws to secure the wires in place.
-
Repeat this process for all the necessary connections.
-
Program the Arduino Mega:
- Connect the Arduino Mega to your computer using the USB cable.
- Open the Arduino IDE (Integrated Development Environment) on your computer.
- Select the appropriate board (Arduino Mega) and serial port from the IDE’s settings.
- Write your Arduino sketch (program) to control your project’s functionality.
-
Verify and upload the sketch to the Arduino Mega board.
-
Test and Refine:
- Power on your Arduino Mega board and observe the behavior of your connected components.
- Test the functionality of your project and make any necessary adjustments or refinements.
- Utilize the prototyping area on the ArduinoMegaScrewshield to add additional circuitry or components as needed.
- Iterate and improve your project based on the results and requirements.
By following these steps, you can quickly set up and start using the Arduino Mega Proto Screwshield PCB in your projects. The shield provides a convenient and organized way to connect external components and prototype your ideas.

Best Practices and Tips
When working with the Arduino Mega Proto Screwshield PCB, consider the following best practices and tips:
-
Plan Your Connections: Before starting your project, carefully plan the connections between the Arduino Mega and the external components. Create a wiring diagram or schematic to visualize the connections and ensure proper pin assignments. This planning stage will save you time and prevent errors during the actual wiring process.
-
Use Appropriate Wire Gauges: Choose the appropriate wire gauges based on the current requirements of your components. Thicker wires (lower gauge numbers) are suitable for higher current applications, while thinner wires (higher gauge numbers) are sufficient for low-current signals. Using the correct wire gauge ensures optimal performance and prevents excessive heat generation.
-
Label Your Connections: Clearly label your connections on both the ArduinoMegaScrewshield and the external components. Use a permanent marker or adhesive labels to indicate the pin numbers, component names, or functions. Labeling helps in troubleshooting and makes it easier to understand the wiring scheme when revisiting the project in the future.
-
Secure Your Wires: When connecting wires to the screw terminals, ensure that they are securely fastened. Gently tug on the wires after tightening the screws to verify a firm connection. Loose connections can lead to intermittent or unreliable behavior in your project.
-
Utilize the Prototyping Area: Take advantage of the prototyping area on the ArduinoMegaScrewshield PCB. Use it to add custom circuitry, mount additional components, or create breakout modules. The prototyping area provides flexibility and expandability to your project, allowing you to incorporate additional features or modifications easily.
-
Maintain a Clean Work Area: Keep your work area clean and organized while working on your project. Remove any loose wires, scraps, or debris that may cause short circuits or interfere with the connections. A clean work area reduces the risk of accidents and improves the overall efficiency of your project.
-
Test and Verify: Before finalizing your project, thoroughly test and verify the functionality of each component connected to the ArduinoMegaScrewshield. Use serial communication or debugging techniques to ensure that the data is being transmitted and received correctly. Test your project under different conditions and scenarios to identify any potential issues or areas for improvement.
-
Document Your Project: Maintain proper documentation of your project, including the wiring scheme, pin assignments, and any custom modifications made using the ArduinoMegaScrewshield. Create a README file or project documentation that explains the purpose, setup instructions, and any important notes. Good documentation facilitates future maintenance, troubleshooting, and sharing of your project with others.
By following these best practices and tips, you can optimize your experience with the Arduino Mega Proto Screwshield PCB and create reliable and efficient projects.

Troubleshooting Common Issues
Despite careful planning and following best practices, you may encounter issues while working with the Arduino Mega Proto Screwshield PCB. Here are some common problems and their potential solutions:
- No Power: If your Arduino Mega is not powering on or your connected components are not functioning, check the following:
- Ensure that the USB cable is securely connected to both the Arduino Mega and your computer or a power source.
- Verify that the power source provides the correct voltage and current required by the Arduino Mega (5V).
-
Check for any loose connections or damaged wires in the power supply circuit.
-
Incorrect Pin Connections: If your project is not behaving as expected, double-check your pin connections:
- Refer to your wiring diagram or schematic to ensure that the components are connected to the correct pins on the ArduinoMegaScrewshield.
- Verify that the wires are securely fastened in the screw terminals and making proper contact.
-
Check for any short circuits or unintended connections between pins or components.
-
Intermittent Behavior: If your project exhibits intermittent or erratic behavior, consider the following:
- Check for loose connections in the screw terminals or soldered joints. Tighten the screws or re-solder the connections if necessary.
- Ensure that the wires used are of the appropriate gauge and not excessively long, which can introduce noise or signal degradation.
-
Verify that the components are functioning correctly and not damaged or faulty.
-
Communication Issues: If you are experiencing communication problems between the Arduino Mega and connected devices or sensors:
- Verify that the correct communication protocol (e.g., I2C, SPI, UART) is being used and the necessary libraries are included in your Arduino sketch.
- Check the wiring connections for the communication pins (e.g., SDA, SCL, MOSI, MISO, RX, TX) and ensure they are connected correctly.
-
Ensure that the baud rates and other communication settings match between the Arduino Mega and the connected devices.
-
Overheating or Unusual Smell: If you notice overheating or an unusual smell coming from the ArduinoMegaScrewshield or connected components:
- Immediately disconnect the power supply and investigate the cause.
- Check for any short circuits, overloaded components, or incorrect wiring that may be causing excessive current draw.
- Verify that the components are rated for the voltage and current being used in your project.
- Allow the components to cool down before reconnecting the power and double-check the connections.
When troubleshooting, it’s important to approach the problem systematically. Start by verifying the basic connections and gradually narrow down the issue to specific components or connections. Use a multimeter to measure voltages, continuity, and resistance if necessary. Consult the Arduino Mega documentation, ArduinoMegaScrewshield pinout, and datasheets of the connected components for further guidance.
If the issue persists, seek assistance from the Arduino community forums, online resources, or experienced professionals. Providing detailed information about your project, wiring setup, and the steps taken to troubleshoot will help others provide more accurate and helpful solutions.
Remember, troubleshooting is an iterative process, and it may take some trial and error to identify and resolve the problem. Stay patient, methodical, and open to learning from the experience.

Frequently Asked Questions (FAQ)
-
What is the difference between the Arduino Mega Proto Screwshield PCB and a breadboard?
The Arduino Mega Proto Screwshield PCB provides a more permanent and stable connection compared to a breadboard. It uses screw terminals to securely connect wires, eliminating the need for frequent plugging and unplugging. The shield also offers a dedicated prototyping area for adding custom circuitry, which is not available on a standard breadboard. -
Can I use the ArduinoMegaScrewshield with other Arduino boards?
No, the Arduino Mega Proto Screwshield PCB is specifically designed for the Arduino Mega board. It is not compatible with other Arduino boards like the Arduino Uno or Arduino Nano due to differences in pin layout and form factor. However, there are similar prototyping shields available for other Arduino boards. -
How many screw terminals are available on the ArduinoMegaScrewshield?
The number of screw terminals on the Arduino Mega Proto Screwshield PCB may vary depending on the specific version or manufacturer. However, most shields provide screw terminals for all the available pins on the Arduino Mega, including digital pins, analog pins, power pins, and communication pins. Refer to the shield’s documentation or pinout diagram for the exact number and arrangement of screw terminals. -
Can I solder components directly onto the ArduinoMegaScrewshield PCB?
Yes, you can solder components directly onto the prototyping area of the ArduinoMegaScrewshield PCB. The prototyping area consists of a grid of through-holes where you can solder components, headers, or wires. This allows you to create custom circuits or add additional functionality to your project. However, be cautious while soldering to avoid damaging the shield or the Arduino Mega board. -
How do I mount the ArduinoMegaScrewshield onto the Arduino Mega board?
To mount the Arduino Mega Proto Screwshield PCB onto the Arduino Mega board, follow these steps: - Align the shield’s female headers with the male headers on the Arduino Mega board.
- Carefully place the shield onto the Arduino Mega, ensuring that


Leave a Reply