Introduction to the PiGRRL Pack
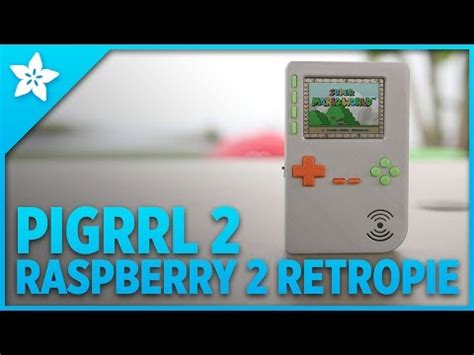
The PiGRRL Pack is an all-in-one kit that allows you to build your own portable gaming console powered by a Raspberry Pi single-board computer. Version 2.0 of the PiGRRL Pack features compatibility with the more powerful Raspberry Pi 2 Model B along with a newly designed custom gamepad PCB for a better gaming experience.
With the PiGRRL Pack 2.0, you can relive the glory days of retro gaming by playing thousands of classic console and arcade games on a handheld device that you assemble yourself. The open-source nature of the Raspberry Pi ecosystem and active maker community means you can customize the PiGRRL to your heart’s content.
What’s Included in the PiGRRL Pack 2.0
The PiGRRL Pack 2.0 comes with everything you need to build your retro gaming handheld, minus the Raspberry Pi itself:
| Component | Description |
|---|---|
| PiGRRL 2.0 PCB | The main circuit board with button controls |
| PiGRRL 2.0 Case | Laser-cut acrylic case pieces |
| PiTFT 2.8″ Display | 320×240 color touchscreen |
| 2500mAh Battery | Rechargeable lithium-ion battery |
| SD Card (4GB) | Pre-loaded with software and ROMs |
| HDMI Cable | For connecting to a TV/monitor |
| Misc. Components | Buttons, wires, screws, standoffs, etc. |
The star of the show is the new PiGRRL 2.0 PCB which acts as the controller with a familiar gamepad button layout. It connects directly to the Raspberry Pi’s GPIO header, making assembly much easier compared to the original PiGRRL kit.
Setting Up the Raspberry Pi 2
While the PiGRRL Pack 2.0 doesn’t include a Raspberry Pi computer, it is designed specifically to house the Raspberry Pi 2 Model B. Let’s go over the specs and setup process for the Pi.
Raspberry Pi 2 Model B Specifications
| Spec | Details |
|---|---|
| SoC | Broadcom BCM2836 |
| CPU | 900 MHz quad-core ARM Cortex-A7 |
| RAM | 1 GB LPDDR2 |
| USB | 4x USB 2.0 ports |
| Storage | MicroSD card slot |
| Video Out | HDMI, composite video |
| Extras | 40-pin GPIO header |
The Raspberry Pi 2 is a major upgrade from the original Pi with about 6x the processing power thanks to its quad-core CPU. More RAM also means better multitasking and the ability to run more demanding software.
Installing the OS and Software
Before assembling the PiGRRL, you’ll need to install the operating system and emulation software on the Raspberry Pi. The recommended setup is as follows:
- Download and install the Raspbian OS disk image to an SD card (4GB or larger).
- Configure the OS settings and connect to Wi-Fi if necessary.
- From the terminal run:
sudo apt-get update

sudo apt-get upgrade - Download and install the RetroArch frontend and various emulator cores using the following guide: RetroArch on Raspberry Pi
- Transfer your legally acquired game ROMs to the appropriate folders on the SD card.

Assembling the PiGRRL
Now comes the fun part – putting all the pieces together! The PiGRRL Pack 2.0 includes an illustrated assembly guide, but let’s go over the key steps.
Gamepad PCB and Buttons
Start by inserting the rubber membranes into the button holes on the PiGRRL PCB, then place the plastic button caps on top. The PiGRRL 2.0 features a total of 12 buttons:
- 4-way directional pad
- 4 action buttons (A/B/X/Y)
- Start and Select buttons
- Left and Right shoulder buttons
Next, solder a 2×20-pin female header onto the PCB so that it can connect to the Raspberry Pi’s GPIO pins. Also, solder the included wires to the points labeled “Battery” and “Audio” on the PCB.
Display and Audio
The PiTFT 2.8″ touchscreen display comes with a separate PCB that handles power and interfacing with the Pi. Start by soldering the included 2×13-pin female header to this board, then attach the display using the included ribbon cable.
For sound, the PiGRRL 2.0 uses the audio pins on the PiTFT board rather than the Pi’s audio jack. Solder the audio wires from the gamepad PCB to the “Audio” pins on the PiTFT board.
Case Assembly
The PiGRRL 2.0 case consists of several laser-cut acrylic pieces that snap together to form a tight housing around the components. Follow these steps:
- Peel off the protective film from each acrylic piece.
- Insert the PiTFT display into the front piece and secure it with mounting tape.
- Attach the battery to the back case piece using mounting tape.
- Fit the gamepad PCB into the slots on the front piece, button side facing out.
- Place the Pi on top of the PCB, aligning the GPIO header pins.
- Sandwich the front and back pieces together, routing the wires as shown in the guide.
- Secure the case halves together using the included screws and nuts.

Using the PiGRRL
With the hardware assembled, it’s time to play some games! Power on the PiGRRL by flipping the switch on the top edge of the case. You should see the RetroArch menu appear on the screen after a few seconds.
Loading and Playing Games
Use the D-pad to scroll through the list of emulators and press the A button to select one. Navigate to the “Load Content” option and choose a game ROM from the appropriate folder.
The emulators included with RetroArch have already been configured with the PiGRRL’s button mapping, so you can start playing right away. Press the Select and Start buttons together to exit back to the RetroArch menu at any time.
Tweaking the Configuration
RetroArch is highly customizable, letting you change all sorts of settings to optimize your gaming experience. A few key options to adjust include:
- Video scaling and filters
- Audio volume and latency
- Controller button mapping
- Save states and load states
Refer to the RetroArch documentation for more details: Configuring RetroArch

Troubleshooting and FAQs
Why isn’t my PiGRRL turning on?
First, make sure the battery is charged by plugging it into a USB power source for a few hours. Next, double-check all the wiring connections inside the case, especially the ones going to the power switch.
The display looks blurry/pixelated. How can I improve it?
The PiTFT is a relatively low resolution screen, so some pixelation is expected. However, you can adjust the video scaling options in RetroArch to find a balance between sharpness and size. The “integer scale” option usually provides the cleanest results.
Can I use the PiGRRL with a TV?
Yes! The Raspberry Pi still has its HDMI port exposed on the bottom edge of the PiGRRL case. Simply connect an HDMI cable from the Pi to your TV to mirror the PiGRRL’s display at a higher resolution. You can also configure RetroArch to output audio through HDMI instead of the speaker.
What other game systems can the PiGRRL emulate?
The RetroArch setup included with the PiGRRL SD card has emulator cores for many popular retro systems including:
- Nintendo: NES, SNES, Game Boy, GBA, Virtual Boy
- Sega: Master System, Genesis/Mega Drive, Game Gear
- Sony: PlayStation 1
- Atari: 2600, 7800, Lynx
- Arcade: MAME, Neo Geo, CP System I/II
Note that more demanding systems like the PlayStation will not run at full speed on a Raspberry Pi 2.
Where can I find more retro games?
There are many websites dedicated to preserving and distributing classic console and arcade games, but be aware of copyright laws in your region. In general, it is only legal to download ROMs for games you already own a physical copy of.
Conclusion
Building your own Raspberry Pi-powered retro gaming handheld is a rewarding experience that lets you put a personal touch on your gaming. With the PiGRRL Pack 2.0 and custom gamepad PCB, it’s easier and more fun than ever to dive into the world of emulation. While it may take some time and practice to assemble the kit, the end result is well worth it.
The PiGRRL also serves as a great starting point for further customization and experimentation, whether you want to 3D print a new case, add more buttons, or even create your own game. The Raspberry Pi and emulation scenes are full of passionate makers constantly inventing new ways to experience classic gaming.
For more information and support with your PiGRRL build, check out the official Adafruit guide: Assemble the PiGRRL 2
Happy gaming!


Leave a Reply