Introduction to Prototyping Boards
A prototyping board, also known as a breadboard, is an essential tool for electronic hobbyists, students, and professionals alike. It allows for quick and easy creation of electronic circuits without the need for soldering. Prototyping boards come in various sizes and configurations, making them versatile for a wide range of projects.
What is a Prototyping Board?
A prototyping board is a reusable platform used to build and test electronic circuits. It consists of a perforated board with numerous holes arranged in a grid pattern. These holes are connected by metal strips underneath the board, allowing components to be inserted and connected without soldering.
Advantages of Using a Prototyping Board
- Quick and easy circuit assembly
- No soldering required
- Reusable for multiple projects
- Allows for easy modifications and debugging
- Ideal for learning and experimenting with electronics
Types of Prototyping Boards
There are several types of prototyping boards available, each with its own unique features and benefits.
Solderless Breadboards
Solderless breadboards are the most common type of prototyping board. They feature a plastic base with metal clips that hold components in place. The board is divided into rows and columns, with each row connected by a metal strip underneath.
| Feature | Description |
|---|---|
| Holes | Arranged in a grid pattern, typically spaced 0.1 inches apart |
| Rows | Connected by metal strips, allowing for easy component connection |
| Power Rails | Dedicated rows for connecting power and ground |
| Size | Available in various sizes, from small to large |
Stripboards
Stripboards, also known as Veroboards, are similar to solderless breadboards but require soldering. They consist of a perforated board with copper strips running along one side. Components are soldered directly to the copper strips, creating a more permanent connection.
| Feature | Description |
|---|---|
| Holes | Arranged in a grid pattern, typically spaced 0.1 inches apart |
| Copper Strips | Running along one side of the board, used for soldering components |
| Size | Available in various sizes, from small to large |
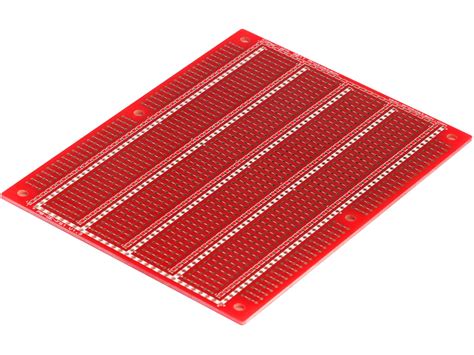
PCB Prototyping Boards
PCB (Printed Circuit Board) prototyping boards are used for creating Custom PCBs. They consist of a copper-clad board with a pre-printed circuit pattern. Components are soldered directly to the board, following the circuit design.
| Feature | Description |
|---|---|
| Copper-Clad Board | A board with a layer of copper on one or both sides |
| Pre-Printed Circuit | A circuit pattern printed on the board, used as a guide for soldering |
| Size | Available in various sizes, depending on the project requirements |

How to Use a Prototyping Board
Using a prototyping board is relatively simple, but it does require some basic knowledge of electronic components and circuits.
Step 1: Gather Components
Before starting, gather all the necessary components for your project. This may include resistors, capacitors, transistors, integrated circuits, and other electronic components.
Step 2: Plan Your Circuit
Sketch out your circuit design on paper or use a circuit design software to create a schematic. This will help you visualize the connections and ensure that you have all the necessary components.
Step 3: Place Components
Begin placing your components on the prototyping board, following your circuit schematic. For solderless breadboards, simply insert the component leads into the appropriate holes. For stripboards and PCB prototyping boards, you’ll need to solder the components in place.
Step 4: Make Connections
Using jumper wires or solder, make the necessary connections between components according to your circuit schematic. Pay attention to the polarity of components like diodes and electrolytic capacitors.
Step 5: Test and Debug
Once your circuit is complete, it’s time to test it. Connect power to the appropriate points on the board and use a multimeter to check for continuity and proper voltage levels. If something isn’t working as expected, carefully review your connections and components for any errors.

Tips and Tricks for Using Prototyping Boards
Here are some helpful tips and tricks to keep in mind when working with prototyping boards:
- Keep your workspace clean and organized to avoid confusion and mistakes.
- Use color-coded jumper wires to make connections easier to follow.
- Double-check component polarity before making connections.
- Use a multimeter to test connections and voltage levels regularly.
- Take breaks and step away from your project if you’re feeling frustrated or stuck.

Advanced Techniques for Prototyping Boards
Once you’ve mastered the basics of using prototyping boards, you may want to explore some more advanced techniques.
Using Integrated Circuits
Integrated circuits (ICs) are small chips that contain multiple electronic components in a single package. They can be used to simplify complex circuits and reduce the number of components needed. When using ICs on a prototyping board, be sure to follow the manufacturer’s pinout diagrams and use appropriate voltage levels.
Creating Modular Circuits
Modular circuits are designed to be easily connected and disconnected, allowing for greater flexibility and reusability. By breaking your circuit into smaller, self-contained modules, you can easily swap out components or make modifications without having to rebuild the entire circuit.
Incorporating Microcontrollers
Microcontrollers are small, programmable computers that can be used to control electronic circuits. They can be programmed to perform a wide range of tasks, from simple on/off switching to complex sensor monitoring and data processing. When incorporating a microcontroller into your prototyping board, be sure to use appropriate voltage levels and follow the manufacturer’s programming guidelines.
Frequently Asked Questions (FAQ)
- What is the difference between a solderless breadboard and a stripboard?
-
A solderless breadboard allows for components to be inserted and connected without soldering, while a stripboard requires soldering components to copper strips.
-
Can I reuse a prototyping board for multiple projects?
-
Yes, prototyping boards are designed to be reusable. Simply remove the components and wires from one project and use the board for another.
-
What should I do if my circuit isn’t working as expected?
-
First, carefully review your connections and components for any errors. Use a multimeter to check for continuity and proper voltage levels. If the problem persists, try breaking the circuit into smaller sections and testing each part individually.
-
Can I use a prototyping board for a permanent project?
-
While prototyping boards are primarily designed for temporary use, you can create a permanent project by soldering components directly to a stripboard or PCB prototyping board. However, for long-term durability and reliability, it’s best to create a custom PCB.
-
What are some common mistakes to avoid when using a prototyping board?
- Some common mistakes include incorrect component placement, reversed polarity, and improper connections. To avoid these issues, always double-check your component placement and polarity, and use a multimeter to test connections regularly.
Conclusion
Prototyping boards are an essential tool for anyone working with electronics, from beginners to professionals. They allow for quick and easy circuit creation, modification, and debugging, without the need for soldering. By understanding the different types of prototyping boards and following best practices for their use, you can bring your electronic projects to life with confidence and efficiency.


Leave a Reply