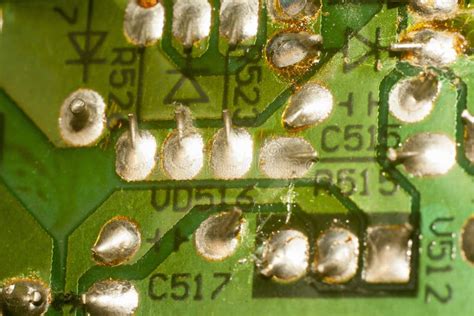
1. Cold Solder Joints
Cold solder joints occur when the solder does not melt completely, resulting in a weak and unreliable connection. This can happen when the soldering iron is not hot enough, the solder is of poor quality, or the soldering time is too short.
To avoid cold solder joints, ensure that the soldering iron is set to the correct temperature (usually between 600-700°F or 315-370°C) and that you are using high-quality solder. Apply the solder to the joint for a sufficient amount of time to allow it to melt completely and flow around the component lead and pad.
2. Bridging
Bridging occurs when solder accidentally connects two adjacent pads or traces on the PCB, creating a short circuit. This can happen when too much solder is applied or when the soldering iron is moved too slowly across the joint.
To prevent bridging, use a soldering iron with a fine tip and apply the solder carefully, ensuring that it does not flow onto adjacent pads or traces. If bridging does occur, use a solder wick or a desoldering pump to remove the excess solder.

3. Insufficient Solder
Insufficient solder can result in a weak or intermittent connection, leading to device malfunction. This can happen when too little solder is applied or when the soldering iron is not in contact with the joint for long enough.
To ensure sufficient solder, apply enough to create a concave fillet around the component lead and pad. The solder should flow smoothly and evenly around the joint.

4. Excessive Solder
Excessive solder can cause bridging, make the joint difficult to inspect, and create a messy appearance. This can happen when too much solder is applied or when the soldering iron is held on the joint for too long.
To avoid excessive solder, apply just enough to create a proper joint. Use a soldering iron with temperature control to prevent overheating the joint and causing the solder to flow excessively.

5. Lifted Pads
Lifted pads occur when the copper pad on the PCB separates from the board during soldering. This can happen when the soldering iron is applied for too long, causing the adhesive holding the pad to the board to deteriorate.
To prevent lifted pads, avoid applying the soldering iron to the joint for too long. If a pad does lift, it can sometimes be reattached using epoxy or by carefully soldering it back onto the board.
6. Tombstoning
Tombstoning, also known as drawbridging, occurs when a surface-mount component stands up on one end during soldering. This can happen when one pad is heated more than the other, causing the component to pivot on the molten solder.
To avoid tombstoning, ensure that both pads are heated evenly during soldering. Use a soldering iron with a chisel tip to apply heat to both pads simultaneously, and avoid applying too much solder to one pad.
7. Solder Balls
Solder balls are small spheres of solder that can form on the PCB during soldering. They can cause short circuits and are difficult to remove.
To prevent solder balls, use a soldering iron with temperature control and avoid applying too much solder. If solder balls do form, they can be removed using a pair of tweezers or a solder wick.
8. Flux Residue
Flux is a chemical used to clean the surfaces of the component leads and PCB pads, helping the solder to flow and adhere properly. However, if too much flux is used or if it is not cleaned off after soldering, it can leave a sticky residue on the board that can attract dust and debris.
To avoid flux residue, use flux sparingly and clean the board with isopropyl alcohol after soldering. Some fluxes are designed to be “no-clean,” meaning they do not leave a residue and do not require cleaning after soldering.
9. Overheated Components
Overheating components during soldering can cause damage, leading to device failure. This can happen when the soldering iron is applied for too long or at too high a temperature.
To prevent overheating, use a soldering iron with temperature control and avoid applying it to the component for longer than necessary. Follow the manufacturer’s recommendations for soldering temperature and duration.
10. Insufficient Wetting
Insufficient wetting occurs when the solder does not flow properly onto the component lead or PCB pad, resulting in a weak or unreliable connection. This can happen when the surfaces are not clean or when the soldering temperature is too low.
To ensure proper wetting, clean the component leads and PCB pads before soldering, and use a soldering iron set to the correct temperature. Apply the solder to the joint and allow it to flow around the lead and pad.
11. Solder Icicles
Solder icicles are sharp peaks of solder that can form on the joint during cooling. They can cause short circuits and are a safety hazard.
To prevent solder icicles, avoid applying too much solder to the joint and allow it to cool naturally. Do not blow on the joint or move the board while the solder is cooling.
12. Cracked Solder Joints
Cracked solder joints can occur when the joint is subjected to mechanical stress, such as bending or vibration. They can cause intermittent or complete loss of electrical connection.
To avoid cracked solder joints, ensure that the PCB is properly supported during soldering and handling. Use strain relief on wires and cables to prevent stress on the solder joints.
13. Soldering Iron Marks
Soldering iron marks are dark spots or lines that can form on the PCB when the soldering iron is applied for too long or with too much pressure. They can be unsightly and may indicate damage to the board.
To prevent soldering iron marks, use a soldering iron with a clean, tinned tip and avoid applying too much pressure or heat to the board. Use a lightweight soldering iron stand to hold the iron when not in use.
14. Solder Whiskering
Solder whiskering is the growth of thin, hair-like strands of solder from the surface of the joint. It can cause short circuits and is a reliability concern in high-reliability applications.
To prevent solder whiskering, use solder alloys that are resistant to whiskering, such as lead-free solders containing silver or copper. Ensure that the PCB and components are clean and free of contaminants that can promote whiskering.
15. Poor Soldering Technique
Poor soldering technique can result in many of the problems described above, as well as an overall poor quality of the solder joints. This can happen when the operator is not properly trained or when the soldering equipment is not suitable for the task.
To ensure good soldering technique, provide proper training to the operators and use high-quality soldering equipment. Follow the manufacturer’s recommendations for soldering temperature, duration, and technique. Regularly inspect the solder joints for quality and take corrective action as needed.
| Problem | Cause | Solution |
|---|---|---|
| Cold Solder Joints | – Soldering iron not hot enough – Poor quality solder – Insufficient soldering time |
– Set soldering iron to correct temperature – Use high-quality solder – Apply solder for sufficient time |
| Bridging | – Too much solder applied – Soldering iron moved too slowly |
– Use soldering iron with fine tip – Apply solder carefully – Remove excess solder with wick or pump |
| Insufficient Solder | – Too little solder applied – Soldering iron not in contact long enough |
– Apply enough solder for concave fillet – Ensure solder flows smoothly around joint |
| Excessive Solder | – Too much solder applied – Soldering iron held on joint too long |
– Apply just enough solder for proper joint – Use soldering iron with temperature control |
| Lifted Pads | – Soldering iron applied too long – Adhesive holding pad deteriorated |
– Avoid applying soldering iron too long – Reattach lifted pad with epoxy or soldering |
| Tombstoning | – One pad heated more than the other – Component pivots on molten solder |
– Heat both pads evenly during soldering – Use chisel tip to apply heat to both pads – Avoid applying too much solder to one pad |
Frequently Asked Questions (FAQ)
1. What is the proper soldering temperature for PCBs?
The proper soldering temperature for PCBs depends on the type of solder being used. For lead-based solder, a temperature between 600-700°F (315-370°C) is typically recommended. For lead-free solder, a higher temperature of 700-800°F (370-425°C) may be necessary. Always refer to the manufacturer’s recommendations for the specific solder being used.
2. How can I tell if a solder joint is good?
A good solder joint should be shiny and smooth, with a concave fillet that flows evenly around the component lead and PCB pad. The solder should be free of voids, cracks, or excessive peaks. The joint should also be mechanically strong and able to withstand moderate stress without breaking.
3. Can I reuse solder?
While it is possible to reuse solder, it is generally not recommended. Solder can become contaminated with impurities over time, which can affect its performance and reliability. It is best to use fresh solder for each soldering job to ensure the best results.
4. How often should I clean my soldering iron tip?
The soldering iron tip should be cleaned frequently to remove oxidation and buildup of flux and solder. A clean tip will ensure better heat transfer and a higher quality solder joint. Clean the tip by wiping it on a damp sponge or brass wool pad after each use, and tin the tip with fresh solder before storing the iron.
5. What should I do if I accidentally create a solder bridge?
If a solder bridge is created between two adjacent pads or traces, it can be removed using a solder wick or desoldering pump. Place the wick or pump over the bridge and apply heat with the soldering iron until the solder is absorbed. Be careful not to apply too much heat or pressure, as this can damage the PCB or components. If the bridge is small, it may also be possible to carefully scrape it away with a sharp tool, such as a scalpel or tweezers.
Conclusion
PCB Soldering is a critical process in the manufacturing of electronic devices, and it is important to avoid common problems that can affect the quality and reliability of the solder joints. By following proper techniques, using high-quality materials and equipment, and regularly inspecting the solder joints, it is possible to achieve reliable and long-lasting connections on PCBs. The 15 common PCB Soldering Problems discussed in this article can serve as a guide for troubleshooting and preventing issues during the soldering process.


Leave a Reply