Introduction
Do you ever find yourself turning up the volume on your headphones or speakers to drown out background noise? Or maybe you notice a persistent hiss or hum coming through even when no audio is playing. These are common issues caused by electrical noise interfering with the audio signal. Luckily, there is a way to combat this problem: by using a Noise Filter circuit.
In this article, we’ll dive into what noise is in the context of audio circuits, how it can negatively impact sound quality, and most importantly – how to design and build your own noise filter to get the cleanest possible audio from your listening devices. Whether you’re an audiophile looking to perfect your hi-fi setup or just want to improve the sound coming from your smartphone, understanding noise filtration is key. Let’s get started!
Understanding Noise in Audio Circuits
Before we look at noise filters, it’s important to understand what noise is and how it manifests in audio systems. In the simplest terms, noise is any unwanted signal that gets introduced into the audio signal path. There are a few main types of noise:
Thermal Noise
Also known as Johnson–Nyquist noise, this is caused by the random motion of electrons due to heat in electrical conductors. It is present in all circuits and increases with temperature and resistance. Thermal noise has a “white” spectrum, meaning it has equal intensity at all frequencies.
Shot Noise
This type of noise is associated with current flow across a potential barrier, such as in diodes and transistors. Like thermal noise, it has a white spectrum.
Flicker Noise
Also called 1/f noise or pink noise, this has an inverse relationship between its intensity and frequency – it is stronger at lower frequencies. It is caused by defects in semiconductors.
Electromagnetic Interference (EMI)
EMI noise comes from external sources like power lines, motors, switching power supplies, etc. It can be picked up by poorly shielded audio cables or get into the circuit board itself.
In an ideal world, the audio signal would travel from source to output with perfect fidelity. But in reality, these types of noise get added in along the way, resulting in a degraded signal.

Quantifying Noise
To determine how much noise is present in an audio system, we can use a few different measurements:
Signal-to-Noise Ratio (SNR)
SNR compares the level of the desired signal to the level of background noise. It is usually expressed in decibels (dB). A higher SNR means the signal is cleaner, with less noise. CD audio typically has a SNR of about 90-95 dB.
Dynamic Range
This is the ratio between the largest and smallest values that a system can represent. It is also expressed in dB. Dynamic range is limited by the noise floor at the bottom end and the maximum output level at the top end.
Total Harmonic Distortion + Noise (THD+N)
THD measures the distortion introduced by the audio system, while THD+N includes noise in the measurement as well. A lower value indicates a higher fidelity system.
By using these measurements, we can quantify how much noise is present and gauge the effectiveness of noise reduction techniques.

Types of Noise Filters
Now that we know what we’re dealing with, let’s look at some common types of noise filters used in audio circuits:
Passive Low-Pass Filter
A passive low-pass filter (LPF) allows low frequencies to pass through while attenuating high frequencies. It can be as simple as a single resistor and capacitor. The cutoff frequency is determined by the RC time constant. A LPF can be effective at reducing high frequency noise.
Passive High-Pass Filter
The opposite of a LPF, a passive high-pass filter (HPF) passes high frequencies while attenuating low frequencies. It can be used to block DC offset and subsonic noise.
Ferrite Beads
Ferrite beads are passive components that act as high impedance to high frequency noise. They are often used on power supply lines and audio cables. The impedance of the bead increases with frequency, effectively blocking high frequency noise from passing through.
Active Filters
Active filters use operational amplifiers (op-amps) along with resistors and capacitors to create more complex filter topologies like Butterworth, Chebyshev, and Bessel filters. They can provide a sharper cutoff and higher order filtering than passive filters.
Balanced Audio
Balanced audio uses differential signaling to reject common-mode noise. The audio signal is transmitted over two wires with equal and opposite polarity, along with a ground wire. Any noise picked up by the wires will be common to both and can be rejected by the differential receiver. Balanced audio is commonly used in professional audio equipment.

Designing a Noise Filter Circuit
Now that we’ve covered the basics of noise and filtration, let’s walk through the process of designing a noise filter for your audio system.
Step 1: Identify the Noise
The first step is to determine what kind of noise you are dealing with. Is it a constant hiss or hum? Does it change with volume? Is it only present with certain audio sources? Answering these questions will help narrow down the type of filter needed.
Step 2: Measure the Noise
Using an oscilloscope or spectrum analyzer, measure the frequency and amplitude of the noise. This will give you a quantitative idea of what needs to be filtered out. If you don’t have access to this equipment, you can make a rough estimate by ear.
Step 3: Choose a Filter Topology
Based on the noise characteristics, choose an appropriate filter topology. For example, if you are dealing with high frequency noise, a low-pass filter is a good choice. If the noise is at 60 Hz from power line interference, a Notch Filter tuned to 60 Hz would be effective.
Step 4: Calculate Component Values
Once you have chosen a filter topology, use filter design equations or simulation software to calculate the necessary component values. The key parameters are the cutoff frequency (fc) and the order of the filter. A higher order filter will have a sharper cutoff but will be more complex to implement.
For example, for a simple RC low-pass filter, the cutoff frequency is given by:
fc = 1 / (2π * R * C)
Where R is the resistance in ohms and C is the capacitance in farads.
Step 5: Simulate and Test
Before building the actual circuit, it’s a good idea to simulate it using software like LTSpice or Multisim. This allows you to verify the filter response and make any necessary adjustments.
Once you are satisfied with the simulation, build the circuit on a Breadboard or PCB and test it with actual audio signals. Use an oscilloscope to verify that the noise is being attenuated as expected.
Step 6: Integrate into Audio System
Finally, integrate the noise filter into your audio system. This may involve placing it inline with the audio signal path, such as between the source and amplifier. Make sure to use appropriate connectors and shielded cables to minimize any additional noise pickup.
Example Noise Filter Circuit
Let’s walk through an example of designing a simple low-pass filter to reduce high frequency noise.
Noise Characteristics
- Constant white noise above 10 kHz
- Amplitude of 50 mV
Filter Design
- Passive RC low-pass filter
- Cutoff frequency of 8 kHz
- 1st order filter
To calculate the component values, we use the equation:
fc = 1 / (2π * R * C)
Rearranging to solve for C:
C = 1 / (2π * R * fc)
Let’s choose a standard resistor value of 2.2 kΩ. Plugging in the values:
C = 1 / (2π * 2200 * 8000) ≈ 9 nF
The closest standard capacitor value is 10 nF, so we’ll use that.
Simulation
Here is the LTSpice schematic for the low-pass filter:
And here is the simulated frequency response:
As we can see, the filter has a -3 dB point right around 8 kHz, as designed. The high frequency noise should be significantly attenuated.
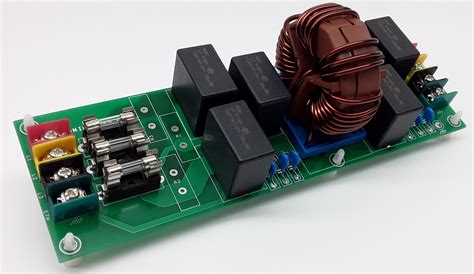
Breadboard Prototype
Here is the filter built on a breadboard:
When tested with an audio signal, the high frequency noise is noticeably reduced, resulting in a cleaner sound.
Conclusion
Noise is an unavoidable reality in audio systems, but by understanding its sources and characteristics, we can effectively combat it using noise filters. Whether using simple passive filters or more complex active topologies, the goal is to attenuate the unwanted noise while preserving the desired audio signal. By following the design process outlined in this article, you can create custom noise filters tailored to your specific audio setup. The end result is a cleaner, clearer sound that lets you enjoy your music and audio content to the fullest.
FAQ
What is the best type of noise filter for audio?
There is no single “best” type of noise filter as it depends on the specific noise characteristics and the audio system requirements. Low-pass, high-pass, and band-pass filters are all commonly used. Passive filters are simple and effective for many situations, while active filters offer more control and flexibility.
Can I use a noise filter with any audio device?
In theory, yes – a well-designed noise filter can be used with any audio source or device. However, it’s important to match the filter characteristics to the device. For example, a filter designed for line-level signals may not work well with a low-output device like a microphone.
Do I need a separate noise filter for each channel?
It depends on the audio setup. For stereo systems, you may need a separate filter for the left and right channels. However, if the noise is common to both channels (e.g. power supply noise), a single filter may be sufficient. In Surround Sound systems, each channel may benefit from its own filter.
Can a noise filter completely eliminate noise?
No filter can completely eliminate noise as it is always present to some degree. The goal is to reduce the noise to a level where it is no longer noticeable or objectionable. The amount of noise reduction achievable depends on the filter design and the characteristics of the noise itself.
Are there any drawbacks to using noise filters?
The main potential drawback is that a poorly designed filter can negatively impact the audio signal, such as by introducing distortion or altering the frequency response. It’s important to choose the right filter design and component values for the specific application. In some cases, the added complexity and cost of a noise filter may not be worth the benefit.


Leave a Reply