Introduction to Laser-Cut Stencils
Laser-cut stencils have revolutionized the world of art and crafts, offering a precise and efficient way to create intricate designs on various surfaces. These stencils are made using laser cutting technology, which allows for highly detailed and accurate cuts, resulting in clean and professional-looking stencils. With the increasing popularity of laser-cut stencils, artists, crafters, and DIY enthusiasts can now easily create stunning works of art with minimal effort.
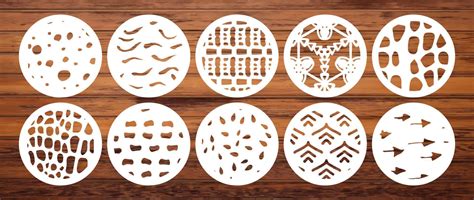
What are Laser-Cut Stencils?
Laser-cut stencils are thin sheets of material, usually made from mylar, plastic, or metal, that have been cut using a laser cutting machine. The laser cuts out the desired design, leaving a negative space that allows paint, ink, or other mediums to pass through and create the image on the surface below. These stencils can be used for a wide range of applications, including:
- Painting on walls, canvas, or wood
- Spray painting on fabric or clothing
- Creating designs on cakes and other food items
- Decorating furniture and home decor items
- Making signs and labels
Advantages of Laser-Cut Stencils
Compared to traditional hand-cut stencils, laser-cut stencils offer several advantages:
- Precision: Laser cutting technology allows for extremely precise and accurate cuts, resulting in clean and crisp edges.
- Consistency: With laser-cut stencils, you can create multiple identical stencils, ensuring consistent results every time.
- Durability: Laser-cut stencils are typically made from strong, durable materials that can withstand repeated use without degrading.
- Complexity: Laser cutting enables the creation of highly intricate and detailed designs that would be difficult or impossible to achieve with hand-cut stencils.
- Time-saving: Creating stencils using a laser cutter is much faster than hand-cutting, allowing you to produce stencils in a fraction of the time.
Types of Laser-Cut Stencils
There are several types of laser-cut stencils available, each with its own unique characteristics and applications.
Mylar Stencils
Mylar stencils are made from a thin, flexible plastic material that is transparent and durable. They are ideal for use with spray paint, airbrush, and other liquid mediums. Mylar stencils are easy to clean and can be used multiple times without losing their shape or quality.
Plastic Stencils
Plastic stencils are made from a thicker, more rigid material than mylar stencils. They are best suited for use with thicker paints and mediums, such as acrylic or oil paints. Plastic stencils are also durable and can be used repeatedly, but they may be more difficult to clean than mylar stencils.
Metal Stencils
Metal stencils are made from thin sheets of metal, such as brass or stainless steel. They are extremely durable and can withstand heavy use and cleaning. Metal stencils are ideal for use with high-temperature applications, such as ceramic or glass painting, as they can withstand the heat without warping or melting.

Creating Your Own Laser-Cut Stencils
While you can purchase pre-made laser-cut stencils, creating your own custom stencils allows you to bring your unique designs to life. Here’s a step-by-step guide to creating your own laser-cut stencils:
-
Design your stencil: Create your stencil design using a vector graphics software, such as Adobe Illustrator or CorelDRAW. Make sure your design is compatible with laser cutting by ensuring that all lines are connected and there are no floating elements.
-
Choose your material: Select the appropriate material for your stencil based on your intended use and the medium you’ll be working with. Mylar, plastic, and metal are common choices.
-
Prepare your file: Convert your design file into a format that is compatible with your laser cutter, such as an AI, EPS, or DXF file. Make sure to set the appropriate cut lines and adjust the settings according to your material’s specifications.
-
Cut your stencil: Load your material into the laser cutter and send your file to the machine. The laser will cut your design, creating your custom stencil.
-
Clean and test your stencil: Once the cutting process is complete, remove your stencil from the laser cutter and clean it to remove any debris or burnt edges. Test your stencil on a scrap piece of material to ensure that it works as intended.

Framing Your Laser-Cut Stencils
Framing your laser-cut stencils not only enhances their appearance but also helps to protect them from damage and makes them easier to store and transport. Here are some tips for framing your stencils:
-
Choose the right frame: Select a frame that is deep enough to accommodate your stencil’s thickness and large enough to fit your design with some extra space around the edges.
-
Use a backing board: Place a backing board behind your stencil to provide support and prevent it from warping or bending. Foam core or sturdy cardboard works well for this purpose.
-
Secure your stencil: Use tape or adhesive to secure your stencil to the backing board, ensuring that it lies flat and doesn’t shift within the frame.
-
Add a protective cover: If desired, add a clear protective cover, such as glass or acrylic, to the front of your frame to protect your stencil from dust and damage.
-
Hang or display your framed stencil: Once your stencil is framed, you can hang it on a wall or display it on a shelf as a decorative piece when not in use.

Applications and Ideas for Laser-Cut Stencils
Laser-cut stencils can be used for a wide range of creative projects, from home decor to fashion and beyond. Here are some ideas to inspire your next stencil project:
-
Wall art: Use your laser-cut stencils to create unique and personalized wall art by painting designs onto canvas or directly onto your walls.
-
Fabric printing: Create custom-printed fabric by using your stencils to apply paint or ink to clothing, curtains, or other textile items.
-
Furniture makeovers: Give old furniture a fresh new look by using stencils to paint designs onto tables, chairs, dressers, or cabinets.
-
Gift wrap and cards: Use your stencils to create one-of-a-kind gift wrap, gift bags, and greeting cards by applying paint or ink to paper or cardstock.
-
Cake decorating: Create stunning cake designs by using your stencils to apply icing, cocoa powder, or edible glitter to your baked goods.
-
Sign making: Make custom signs for your home, office, or events by using your stencils to paint lettering and designs onto wood, metal, or other surfaces.
| Application | Stencil Material | Medium |
|---|---|---|
| Wall art | Mylar, Plastic | Spray paint, acrylic paint |
| Fabric printing | Mylar, Plastic | Fabric paint, ink |
| Furniture makeovers | Plastic, Metal | Chalk paint, acrylic paint |
| Gift wrap and cards | Mylar, Plastic | Acrylic paint, ink, markers |
| Cake decorating | Plastic | Icing, cocoa powder, edible glitter |
| Sign making | Metal, Plastic | Acrylic paint, spray paint |
Tips and Tricks for Using Laser-Cut Stencils
To get the best results when using your laser-cut stencils, keep these tips and tricks in mind:
-
Secure your stencil: Use a spray adhesive or tape to secure your stencil to your surface to prevent paint from seeping under the edges.
-
Use the right paint: Choose a paint that is appropriate for your surface and compatible with your stencil material. Spray paint works well with mylar and plastic stencils, while thicker paints like acrylic are better suited for plastic and metal stencils.
-
Apply paint evenly: Use even, light coats of paint or ink to prevent bleeding and achieve crisp, clean lines. Multiple thin coats are better than one heavy coat.
-
Clean your stencil: After each use, clean your stencil with soap and water (for mylar and plastic) or a solvent (for metal) to remove any paint residue and prevent clogging.
-
Store your stencils properly: Keep your stencils flat and away from direct sunlight or extreme temperatures to prevent warping or damage. Store them in a dry, cool place, such as a flat file or a large envelope.
Frequently Asked Questions (FAQ)
-
Can I use laser-cut stencils on any surface?
Laser-cut stencils can be used on a variety of surfaces, including paper, fabric, wood, metal, and glass. However, it’s essential to choose the appropriate stencil material and paint or medium for your specific surface to ensure the best results. -
How do I clean my laser-cut stencils?
Cleaning your laser-cut stencils depends on the material they are made from. Mylar and plastic stencils can be cleaned with soap and water, while metal stencils may require a solvent, such as mineral spirits, to remove paint residue. Always clean your stencils after each use to prevent clogging and ensure they remain in good condition. -
Can I reuse my laser-cut stencils?
Yes, laser-cut stencils are designed to be reusable. With proper cleaning and storage, your stencils can be used multiple times without losing their quality or shape. -
How do I create a design for a laser-cut stencil?
To create a design for a laser-cut stencil, you’ll need to use a vector graphics software, such as Adobe Illustrator or CorelDRAW. Your design should consist of clean, connected lines and shapes, without any floating elements. Once your design is complete, save it in a format that is compatible with your laser cutter, such as AI, EPS, or DXF. -
Can I use laser-cut stencils for commercial purposes?
Yes, you can use laser-cut stencils for commercial purposes, such as creating products for sale or offering stenciling services. However, if you are using a design that is not your own, make sure you have the appropriate permissions or licenses to use it commercially to avoid any legal issues.
Conclusion
Laser-cut stencils offer a versatile and efficient way to create stunning works of art on a variety of surfaces. With their precision, durability, and ease of use, these stencils have become a popular choice among artists, crafters, and DIY enthusiasts alike. By following the tips and techniques outlined in this article, you can create your own custom laser-cut stencils and unleash your creativity on a wide range of projects, from home decor to fashion and beyond. Whether you’re a seasoned artist or a beginner, laser-cut stencils provide a fun and accessible way to express your artistic vision and bring your ideas to life.


Leave a Reply