What is EAGLE?
EAGLE is a PCB (Printed Circuit Board) design software developed by Autodesk. It consists of three main modules:
- Schematic Editor: Used for creating electronic schematics
- Layout Editor: Used for designing PCB layouts
- Autorouter: Automatically routes traces between components on the PCB
EAGLE is available for Windows, macOS, and Linux operating systems and offers a free version for non-commercial use with some limitations.
Creating a New Project
To start a new project in EAGLE, follow these steps:
- Open EAGLE and click on “File” > “New” > “Project”.
- Choose a location to save your project and give it a name.
- Right-click on your project in the “Projects” tree and select “New” > “Schematic”.
Your new schematic will open in the Schematic Editor window.

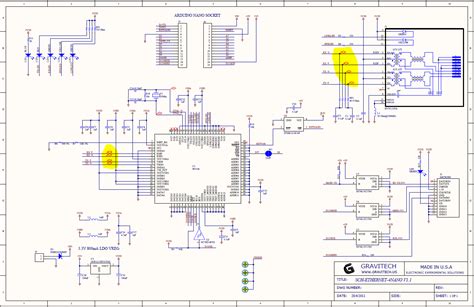
The Schematic Editor
The Schematic Editor is where you create the electronic schematic for your project. It consists of several key elements:
- Components: The building blocks of your schematic, representing various electronic parts
- Nets: The connections between components
- Buses: Groups of related nets
- Ports: Connection points for external devices or other sheets in multi-sheet schematics
Adding Components
To add a component to your schematic:
- Click on the “Add” tool in the toolbar or press the “Add” button on your keyboard.
- Search for the desired component in the libraries.
- Click on the component and place it in the schematic.
- Repeat for all required components.
Connecting Components
To connect components using nets:
- Click on the “Net” tool in the toolbar or press the “N” key on your keyboard.
- Click on the first pin you want to connect.
- Click on the second pin to complete the connection.
- Repeat for all necessary connections.
Using Buses
When you have multiple related nets, you can use buses to simplify your schematic:
- Click on the “Bus” tool in the toolbar or press the “B” key on your keyboard.
- Draw the bus line in your schematic.
- Use the “Net” tool to connect pins to the bus, naming them appropriately (e.g., “DataBus[0..7]”).
Labeling and Annotation
To keep your schematic organized and easily readable:
- Use the “Label” tool to assign names to nets, buses, and components.
- Use the “Value” tool to assign values to components (e.g., Resistor Values, capacitor values).
- Run the “Annotate” command to automatically assign unique designators to components.

The Layout Editor
Once your schematic is complete, you can switch to the Layout Editor to design the physical PCB. To do this, click on the “Board” icon in the toolbar or select “File” > “Switch to Board”.
The Layout Editor consists of several key elements:
- Packages: The physical footprints of components
- Pads: The copper areas where component leads are soldered
- Traces: The copper paths that connect pads
- Vias: Copper-plated holes that allow traces to pass between layers
- Layers: The different conductive and insulating layers of the PCB
Placing Components
To place components on your PCB:
- Use the “Move” tool to position components as desired.
- Use the “Rotate” tool to orient components correctly.
- Ensure components are placed within the board outline and do not overlap.
Routing Traces
To manually route traces between pads:
- Click on the “Route” tool in the toolbar or press the “X” key on your keyboard.
- Select the desired trace width and layer.
- Click on the starting pad, then click on the ending pad to complete the trace.
- Repeat for all necessary connections.
Alternatively, you can use the Autorouter to automatically route traces:
- Define the board outline and placement of components.
- Set up design rules (e.g., minimum trace width, clearance, via size).
- Click on the “Auto” icon in the toolbar or select “Tools” > “Autorouter”.
- Adjust settings as needed and click “OK” to start the autorouting process.
Design Rule Check (DRC)
Before finalizing your layout, it is essential to run a Design Rule Check (DRC) to ensure your PCB meets manufacturing requirements and functions correctly. To run a DRC:
- Click on the “DRC” icon in the toolbar or select “Tools” > “DRC”.
- Set up the desired design rules.
- Click “Check” to start the DRC process.
- Review any errors or warnings and make necessary corrections.

Generating Manufacturing Files
Once your layout is complete and has passed the DRC, you can generate the necessary files for PCB manufacturing:
- Select “File” > “CAM Processor”.
- Choose the desired output format (e.g., Gerber, Excellon drill files).
- Set up the necessary parameters for each layer.
- Click “Process Job” to generate the output files.
These files can then be sent to a PCB Manufacturer for production.
Tips and Best Practices
To create high-quality schematics and layouts in EAGLE, consider the following tips and best practices:
- Use a consistent naming convention for components, nets, and buses
- Keep your schematic organized and easily readable
- Follow manufacturer recommendations for component footprints and pad sizes
- Adhere to design rules and guidelines for your specific PCB Fabrication process
- Route traces with appropriate width and spacing to ensure signal integrity and manufacturability
- Use ground planes and proper grounding techniques to minimize noise and interference
- Regularly save your work and create backups to avoid data loss
Frequently Asked Questions (FAQ)
-
Is EAGLE free to use?
EAGLE offers a free version for non-commercial use, which has some limitations on board size and layer count. For commercial use or more advanced features, a paid license is required. -
Can I import designs from other software into EAGLE?
Yes, EAGLE supports importing design files from various formats, including Altium Designer, KiCad, and OrCAD. -
How do I create custom components in EAGLE?
To create a custom component, you can either modify an existing component from the libraries or design one from scratch using the Symbol Editor and Package Editor. -
What are the system requirements for running EAGLE?
EAGLE runs on Windows, macOS, and Linux operating systems. The minimum system requirements are a 64-bit processor, 2 GB RAM, and 500 MB of free disk space. -
Where can I find additional resources and support for EAGLE?
Autodesk provides extensive documentation, tutorials, and a user forum for EAGLE on their website. There are also numerous third-party resources, such as online communities, video tutorials, and books, available to help you learn and master EAGLE.
| Feature | Free Version | Paid Version |
|---|---|---|
| Board Size | Limited | Unlimited |
| Number of Layers | 2 | Unlimited |
| Schematic Sheets | 1 | Unlimited |
| Commercial Use | Not Allowed | Allowed |
| Autorouter | Included | Included |
| Technical Support | Community | Official |
In conclusion, EAGLE is a powerful and versatile tool for designing electronic schematics and PCB layouts. By understanding the basics of the Schematic Editor, Layout Editor, and design best practices, you can create professional-quality designs for your projects. With its user-friendly interface and extensive resources, EAGLE is an excellent choice for both beginners and experienced designers alike.


Leave a Reply