What is Automated Optical Inspection?
Automated Optical Inspection is a computerized visual inspection system that uses cameras, lighting, and image processing software to automatically detect and identify defects in manufactured products. AOI systems capture high-resolution images of the inspected object and compare them against a predefined set of criteria or a “golden sample” to identify any discrepancies or anomalies.
AOI technology has evolved significantly over the years, with modern systems incorporating advanced features such as:
- High-resolution cameras with multiple wavelengths (e.g., visible light, infrared, and ultraviolet)
- Sophisticated lighting systems to enhance image quality and highlight specific features
- Machine learning algorithms for adaptive defect detection and classification
- 3D imaging capabilities for inspecting complex geometries and solder joints
Types of AOI Systems
There are several types of AOI systems, each designed for specific applications and industries:
-
2D AOI Systems: These systems use top-down imaging to inspect flat surfaces, such as PCBs, for defects like missing components, incorrect component placement, and solder bridging.
-
3D AOI Systems: These systems employ multiple cameras or structured light techniques to create 3D images of the inspected object, allowing for the detection of height-related defects, such as insufficient Solder Volume or component tilting.
-
Line Scan AOI Systems: These systems use a line scan camera that moves along the inspected object, capturing a continuous stream of images. This type of AOI is particularly useful for inspecting long, continuous products like web materials or large PCBs.
-
Multi-spectral AOI Systems: These systems use cameras with multiple wavelengths to inspect objects under different lighting conditions, enhancing the detection of specific defects or materials.
Benefits of Automated Optical Inspection
Implementing AOI in manufacturing processes offers numerous benefits, including:
-
Improved Quality Control: AOI systems consistently detect and identify defects, reducing the risk of faulty products reaching customers.
-
Increased Efficiency: Automated inspection is much faster than manual inspection, allowing for higher throughput and reduced production time.
-
Reduced Human Error: AOI eliminates the subjectivity and fatigue associated with manual inspection, minimizing the risk of human error.
-
Cost Savings: By detecting defects early in the manufacturing process, AOI helps reduce waste, rework, and scrap, ultimately leading to cost savings.
-
Traceability and Data Collection: AOI systems generate valuable data about the inspected products, enabling better process control, traceability, and continuous improvement.
Applications of Automated Optical Inspection
AOI technology is widely used across various industries, with some of the most common applications being:
Electronics Manufacturing
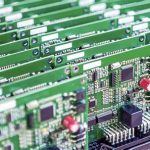
In the electronics industry, AOI is used to inspect PCBs at different stages of the manufacturing process, including:
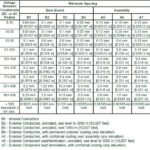
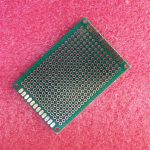
- Bare board inspection: Checking for defects in the PCB substrate, such as shorts, opens, and incorrect etching
- Solder paste inspection (SPI): Verifying the correct application of solder paste before component placement
- Pre-reflow inspection: Checking for correct component placement and orientation before soldering
- Post-reflow inspection: Detecting soldering defects, such as bridging, insufficient solder, or lifted components
| Inspection Stage | Defects Detected |
|---|---|
| Bare Board | Shorts, opens, incorrect etching |
| Solder Paste | Insufficient or excessive solder paste, misalignment |
| Pre-reflow | Incorrect component placement, missing components |
| Post-reflow | Solder bridging, insufficient solder, lifted components |
Semiconductor Manufacturing
AOI is used in semiconductor manufacturing to inspect wafers, die, and packaged devices for defects such as:
- Particle contamination
- Scratches and cracks
- Metallization defects
- Wire bonding issues
| Defect Type | Description |
|---|---|
| Particle Contamination | Unwanted particles on the wafer surface |
| Scratches and Cracks | Physical damage to the wafer or die |
| Metallization Defects | Issues with metal layers, such as opens or shorts |
| Wire Bonding Issues | Problems with wire bonds, such as missing or deformed wires |
Automotive and Aerospace
AOI is used to inspect critical components and assemblies in the automotive and aerospace industries, such as:
- Connectors and Wire Harnesses
- Mechanical parts and assemblies
- Surface finish and coating inspection
Medical Devices
In the medical device industry, AOI ensures the quality and safety of products like:
- Implantable devices
- Surgical instruments
- Diagnostic equipment

Challenges and Limitations of Automated Optical Inspection
While AOI offers significant benefits, there are some challenges and limitations to consider:
-
Initial Investment: Implementing an AOI system can be costly, requiring investments in hardware, software, and training.
-
False Positives and False Negatives: AOI systems may generate false alarms (false positives) or miss actual defects (false negatives), requiring fine-tuning and optimization of the inspection parameters.
-
Limited Flexibility: AOI systems are typically programmed to detect specific defects, making it challenging to adapt to new products or design changes without significant reprogramming.
-
Shadowing and Occlusion: In some cases, the geometry of the inspected object may create shadows or occlude certain areas, making it difficult for the AOI system to capture clear images.
Best Practices for Implementing Automated Optical Inspection
To maximize the benefits of AOI, consider the following best practices:
-
Define Clear Inspection Criteria: Establish well-defined acceptance criteria and defect classifications to ensure consistent and accurate inspections.
-
Optimize Lighting and Image Acquisition: Use appropriate lighting techniques and camera settings to enhance image quality and defect visibility.
-
Regular Calibration and Maintenance: Regularly calibrate and maintain the AOI system to ensure consistent performance and accuracy.
-
Integrate with Other Quality Control Methods: Use AOI in conjunction with other quality control techniques, such as electrical testing or manual inspection, for a comprehensive approach to defect detection.
-
Continuous Improvement: Analyze AOI data to identify trends, root causes of defects, and opportunities for process improvement.
Future Trends in Automated Optical Inspection
As technology advances, AOI systems are expected to evolve and improve in the following areas:
-
AI and Machine Learning: Integrating artificial intelligence and machine learning algorithms will enable AOI systems to adapt to new defect types, improve accuracy, and reduce false alarms.
-
Hyperspectral Imaging: The use of hyperspectral cameras, which capture images across a wide range of wavelengths, will enhance the detection of material-specific defects and anomalies.
-
Inline and 3D AOI: The increased adoption of inline AOI systems and 3D imaging capabilities will enable real-time defect detection and more comprehensive inspections of complex geometries.
-
Integration with Industry 4.0: AOI systems will become more interconnected with other manufacturing technologies, such as robotic automation and data analytics, enabling seamless integration and data-driven decision-making.
Frequently Asked Questions (FAQ)
-
Q: What is the difference between AOI and visual inspection?
A: AOI is an automated process that uses cameras and image processing software to detect defects, while visual inspection relies on human operators to manually inspect products. AOI is faster, more consistent, and less prone to human error compared to visual inspection. -
Q: Can AOI systems inspect all types of products?
A: AOI systems are versatile and can inspect a wide range of products, including PCBs, semiconductors, mechanical parts, and medical devices. However, the specific AOI system and configuration must be tailored to the characteristics and requirements of the inspected product. -
Q: How does AOI handle reflective or transparent surfaces?
A: Inspecting reflective or transparent surfaces can be challenging for AOI systems due to glare or lack of contrast. To overcome this, specialized lighting techniques, such as diffuse or polarized light, can be used to minimize reflections and enhance image quality. -
Q: What is the typical accuracy of AOI systems?
A: The accuracy of AOI systems varies depending on factors such as the complexity of the inspected product, the quality of the imaging system, and the defect detection algorithms used. Modern AOI systems can achieve defect detection accuracies of 95% or higher, with some systems claiming up to 99.9% accuracy. -
Q: How long does it take to set up and program an AOI system for a new product?
A: The setup and programming time for an AOI system depends on the complexity of the product and the desired inspection coverage. Simple products may take a few hours to set up, while more complex products with multiple inspection stages can take several days or weeks. Ongoing fine-tuning and optimization may also be required to maintain optimal performance.
In conclusion, Automated Optical Inspection is a powerful technology that plays a crucial role in ensuring the quality and reliability of products across various industries. By leveraging advanced imaging techniques, computer vision algorithms, and data analytics, AOI systems enable manufacturers to detect defects, reduce waste, and improve overall production efficiency. As technology continues to evolve, AOI is expected to become even more sophisticated, accurate, and integrated with other manufacturing technologies, driving the future of quality control in the Industry 4.0 era.


Leave a Reply