What is a Bug Zapper?
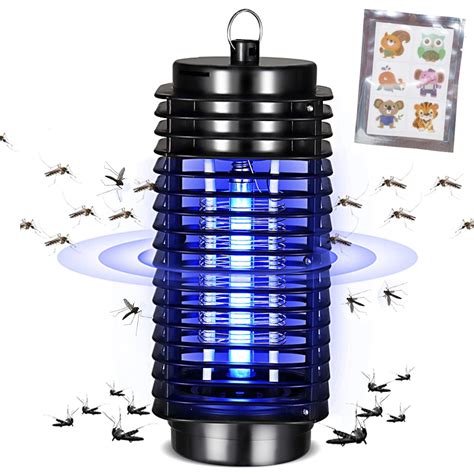
A bug zapper, also known as an electronic insect killer or electrical discharge insect control system, is a device that attracts and kills flying insects using an electrical current. The device typically consists of a light source to attract the insects and a pair of electrified grids or screens to kill them upon contact.
How Does a Bug Zapper Work?
Bug zappers work by luring insects with a bright light, usually in the ultraviolet (UV) spectrum, which is particularly attractive to many flying insects. Once the insects fly towards the light, they come into contact with the electrified grids or screens, which deliver a lethal shock, instantly killing them.
The basic components of a bug zapper include:
- Light source (UV light)
- Electrified grids or screens
- Transformer to step up the voltage
- Housing to contain the components and collect the dead insects
Why Build Your Own Bug Zapper?
Building your own bug zapper circuit offers several advantages over purchasing a commercial unit:
- Cost-effective: DIY bug zappers can be built using readily available components at a fraction of the cost of commercial units.
- Customization: You can tailor the size, shape, and design of your bug zapper to fit your specific needs and preferences.
- Educational: Building a bug zapper is an excellent opportunity to learn about electrical circuits and improve your DIY skills.

Materials Needed for Your DIY Bug Zapper
To build your own bug zapper, you’ll need the following materials:
| Component | Description |
|---|---|
| UV Light Bulb | Attracts insects to the zapper |
| Electrified Grids or Screens | Delivers lethal shock to insects |
| Transformer | Steps up the voltage to power the grids |
| Housing | Contains components and collects dead insects |
| Switches and Wiring | Controls power to the device |
Choosing the Right UV Light Bulb
When selecting a UV light bulb for your bug zapper, consider the following factors:
- Wavelength: Insects are most attracted to UV light in the range of 350-400 nanometers.
- Power: Higher wattage bulbs will attract insects from a greater distance but consume more energy.
- Lifespan: Look for bulbs with a long lifespan to reduce the need for frequent replacements.
Electrified Grids or Screens
The electrified grids or screens are the heart of the bug zapper. They consist of parallel wires or a mesh screen that are charged with a high voltage, typically between 2,000 and 4,000 volts. When an insect comes into contact with the grids, the high voltage delivers a lethal shock.
You can create your own electrified grids using:
- Stainless steel or aluminum wire
- Wire mesh or screen
- Conductive Paint or adhesive
Transformer Selection
To power the electrified grids, you’ll need a transformer that can step up the voltage from your household 110V or 220V to the required 2,000-4,000V. When choosing a transformer, consider the following:
- Input voltage: Ensure the transformer is compatible with your household voltage.
- Output voltage: Select a transformer with an output voltage suitable for your electrified grids.
- Power rating: Choose a transformer with a power rating that matches your bug zapper’s requirements.

Assembling Your DIY Bug Zapper
Now that you have all the necessary components, it’s time to assemble your bug zapper.
Step 1: Prepare the Housing
- Choose a suitable housing material, such as plastic, wood, or metal.
- Drill holes for the UV light bulb, electrified grids, and power cord.
- Ensure the housing has adequate ventilation to prevent overheating.
Step 2: Install the UV Light Bulb
- Mount the UV light bulb socket inside the housing.
- Connect the socket to the power source through a switch.
Step 3: Assemble the Electrified Grids
- Cut the wire or mesh to the desired size and shape.
- Attach the wire or mesh to the housing, ensuring it is securely fastened and evenly spaced.
- Connect the grids to the transformer’s output.
Step 4: Wire the Transformer
- Connect the transformer’s input to the power source through a switch.
- Ensure all connections are secure and properly insulated.
Step 5: Test and Troubleshoot
- Plug in your bug zapper and turn it on.
- Check that the UV light is functioning and the electrified grids are powered.
- If any issues arise, carefully troubleshoot the circuit and components.

Safety Precautions
When building and using your DIY bug zapper, always prioritize safety:
- Work with high voltages only if you have the necessary knowledge and experience.
- Ensure all connections are properly insulated to prevent electric shock.
- Keep the bug zapper away from flammable materials and out of reach of children and pets.
- Always unplug the device before performing maintenance or repairs.
Maintenance and Cleaning
To keep your bug zapper functioning effectively, perform regular maintenance:
- Clean the housing and grids regularly to remove dead insects and debris.
- Replace the UV light bulb as needed, typically every 6-12 months.
- Inspect the wiring and connections periodically for signs of wear or damage.
Environmental Considerations
While bug zappers can be effective at controlling flying insect populations, they may also have unintended consequences:
- Non-target insects: Bug zappers may kill beneficial insects like pollinators and predators that help control pest populations.
- Ineffectiveness against certain pests: Some insects, like mosquitoes, may not be effectively controlled by bug zappers alone.
- Insect debris: Dead insects accumulating in the zapper may attract other pests or create unsanitary conditions.
Consider using bug zappers in combination with other pest control methods and be mindful of their potential impact on the ecosystem.
Frequently Asked Questions (FAQ)
-
Q: Can I use a regular light bulb instead of a UV light in my bug zapper?
A: While a regular light bulb may attract some insects, UV light is much more effective at luring a wide range of flying insects. For the best results, use a UV light bulb specifically designed for bug zappers. -
Q: How often should I clean my bug zapper?
A: The frequency of cleaning depends on the level of insect activity in your area. Generally, it’s a good idea to clean your bug zapper at least once a week to remove dead insects and maintain optimal performance. -
Q: Can I use my DIY bug zapper indoors?
A: Bug zappers are typically designed for outdoor use. Using them indoors may create a fire hazard or pose risks to humans and pets. If you need indoor insect control, consider alternative methods like fly paper or insect traps. -
Q: Will a bug zapper eliminate all the insects in my yard?
A: While bug zappers can effectively reduce flying insect populations, they are not a complete solution. Some insects may not be attracted to the UV light, and zappers do not target insects like ants or spiders. For comprehensive pest control, use bug zappers in combination with other methods. -
Q: Are DIY bug zappers safe to use?
A: When built and used properly, DIY bug zappers can be safe and effective. However, working with high voltages always carries some risk. If you are unsure about your ability to safely build a bug zapper, consider purchasing a commercial unit or seeking the assistance of a qualified electrician.
Conclusion
Building your own bug zapper circuit can be a fun and rewarding DIY project that provides effective insect control for your outdoor spaces. By understanding the basic components and following the steps outlined in this guide, you can create a customized bug zapper that meets your specific needs.
Remember to prioritize safety when working with high voltages and to maintain and clean your bug zapper regularly for optimal performance. While bug zappers can be effective, they should be used in combination with other pest control methods and with consideration for their potential impact on the environment.
Happy zapping, and enjoy your insect-free outdoor experiences!


Leave a Reply