What is DipTrace?
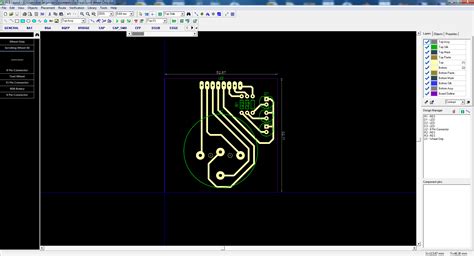
DipTrace is a powerful and user-friendly electronic design automation (EDA) software suite for creating printed circuit boards (PCBs). It offers a comprehensive set of tools for schematic capture, PCB layout, and 3D visualization. DipTrace is widely used by electronics engineers, hobbyists, and students for designing and prototyping PCBs.
Key Features of DipTrace
| Feature | Description |
|---|---|
| Schematic Capture | Create and edit electronic schematics with a wide range of components and symbols |
| PCB Layout | Design PCBs with advanced routing capabilities, including auto-routing and manual routing |
| 3D Visualization | View and inspect PCB designs in 3D for better visualization and catching potential issues |
| Component Libraries | Access an extensive library of components and footprints, with the ability to create custom components |
| Import/Export | Support for various file formats, including Gerber, DXF, and IPC-D-356 |
| Hierarchical Design | Create hierarchical designs for complex projects, making it easier to manage and organize large schematics |
| Real-Time DRC | Perform real-time design rule checks (DRC) to ensure the PCB layout adheres to manufacturing and design constraints |
Gerber Files and Their Importance
Gerber files are the industry standard format for describing the layout of a PCB. They are used by PCB manufacturers to fabricate the physical board. Gerber files contain information about the copper layers, solder mask, silkscreen, and drill holes of a PCB.
Common Gerber File Extensions
| Extension | Description |
|---|---|
| .GBR | Generic Gerber file |
| .GTL | Top copper layer |
| .GBL | Bottom copper layer |
| .GTS | Top solder mask |
| .GBS | Bottom solder mask |
| .GTO | Top overlay (silkscreen) |
| .GBO | Bottom overlay (silkscreen) |
| .GTP | Top paste (solder paste stencil) |
| .GBP | Bottom paste (solder paste stencil) |
| .DRL | Drill file (NC drill file) |

Exporting Gerber Files from DipTrace
To manufacture a PCB designed in DipTrace, you need to export the design as Gerber files. Follow these steps to export Gerber files from DipTrace:
- Open your PCB layout in DipTrace PCB Layout Editor.
- Go to “File” > “Export” > “Gerber…”
- In the Gerber Export dialog, select the layers you want to export. Typically, you’ll need to export the following layers:
- Top and bottom copper layers
- Top and bottom solder mask layers
- Top and bottom silkscreen layers
- Drill file
- Configure the export settings, such as the file format (RS-274X is the most common), units (inches or millimeters), and aperture settings.
- Choose a destination folder for the exported Gerber files.
- Click “Export” to generate the Gerber files.
Tips for Successful Gerber Export
- Always double-check the layer selection before exporting to ensure you have included all necessary layers.
- Verify that the export settings match your PCB manufacturer’s requirements, such as file format, units, and aperture settings.
- Consider exporting a drill file (.DRL) separately, as some manufacturers prefer a separate drill file.
- Inspect the exported Gerber files using a Gerber viewer to catch any potential issues before sending them to the manufacturer.

Common Issues and Troubleshooting
Missing or Incorrect Layers
If you notice that certain layers are missing or incorrect in the exported Gerber files, go back to the export dialog and ensure that all required layers are selected. Pay close attention to the layer names and their corresponding file extensions.
Incorrect Units or Dimensions
If the exported Gerber files have incorrect units or dimensions, check the export settings in the Gerber Export dialog. Make sure the units (inches or millimeters) match your design and manufacturer’s requirements. Also, verify that the dimensions of your PCB layout are correct in DipTrace.
Aperture Errors
Aperture errors can occur when the aperture settings in the Gerber Export dialog are not configured correctly. Consult your PCB manufacturer’s guidelines for the recommended aperture settings. If you encounter aperture errors, try adjusting the aperture settings and re-exporting the Gerber files.
Design Rule Violations
If your PCB layout contains design rule violations, such as overlapping traces or insufficient clearances, the exported Gerber files may not be suitable for manufacturing. Use DipTrace’s real-time DRC feature to identify and resolve any design rule violations before exporting the Gerber files.

Frequently Asked Questions (FAQ)
-
Q: What are the essential layers to include when exporting Gerber files?
A: The essential layers typically include top and bottom copper layers, top and bottom solder mask layers, top and bottom silkscreen layers, and the drill file. -
Q: Can I export Gerber files from DipTrace Schematic Editor?
A: No, Gerber files are exported from the PCB Layout Editor, not the Schematic Editor. You need to have a PCB layout designed before you can export Gerber files. -
Q: What is the difference between RS-274D and RS-274X Gerber formats?
A: RS-274D is an older Gerber format that uses aperture shapes defined in a separate aperture list file. RS-274X, also known as Extended Gerber, includes the aperture definitions within the Gerber file itself, making it more self-contained and widely supported by PCB manufacturers. -
Q: How can I check if my exported Gerber files are correct?
A: You can use a Gerber viewer software to open and inspect the exported Gerber files. Many PCB manufacturers also provide online Gerber viewers where you can upload and check your files before placing an order. -
Q: What should I do if my PCB manufacturer reports issues with my Gerber files?
A: If your PCB manufacturer reports issues with your Gerber files, first verify that you have exported all the necessary layers and that the export settings match their requirements. If the issue persists, contact your manufacturer for specific guidance on how to resolve the problem. They may provide instructions on adjusting your export settings or design to meet their manufacturing constraints.
Conclusion
Exporting Gerber files from DipTrace is a crucial step in the PCB design process, as it enables you to transfer your design to a PCB manufacturer for fabrication. By understanding the importance of Gerber files, the common file extensions, and the export process in DipTrace, you can ensure that your PCB designs are correctly prepared for manufacturing.
Remember to carefully select the necessary layers, configure the export settings according to your manufacturer’s requirements, and inspect the exported Gerber files using a Gerber viewer. By following these best practices and troubleshooting common issues, you can streamline the PCB manufacturing process and achieve successful results.


Leave a Reply