Introduction
When it comes to creating a new electronic device, having a functional prototype is crucial. A PCB Prototype allows you to test your design, identify any issues, and make necessary adjustments before mass production. In this article, we’ll explore ten ways to make a PCB prototype that meets your exact needs, as told by a professional PCB maker.
The Importance of PCB Prototyping
Before diving into the various methods of creating a PCB prototype, let’s discuss why prototyping is so important.
Testing Functionality
A PCB prototype allows you to test the functionality of your design in a real-world setting. You can ensure that all components work together as intended and that the device performs its desired functions.
Identifying Issues
During the prototyping phase, you may discover issues with your design that were not apparent during the planning stage. By identifying and addressing these issues early on, you can save time and money in the long run.
Refining the Design
Based on the results of your prototype testing, you can make necessary adjustments to your design. This iterative process allows you to refine your device until it meets your exact specifications.

10 Ways to Make a PCB Prototype
Now that we understand the importance of PCB prototyping, let’s explore ten ways to create a prototype for your exact needs.
1. Breadboarding
Breadboarding is a quick and easy way to create a prototype of your electronic circuit. It involves using a breadboard, which is a plastic board with holes that allow you to insert components and wires without soldering.
Pros:
– Fast and easy to set up
– No soldering required
– Components can be easily rearranged
Cons:
– Not suitable for complex circuits
– Connections may be unreliable
– Not a permanent solution
2. Stripboard
Stripboard, also known as Veroboard, is a type of prototyping board that consists of a grid of copper strips. You can cut the strips to create the desired connections and solder components onto the board.
Pros:
– More durable than breadboarding
– Allows for more complex circuits
– Relatively inexpensive
Cons:
– Requires soldering skills
– Modifications can be difficult
– Not as professional-looking as a custom PCB
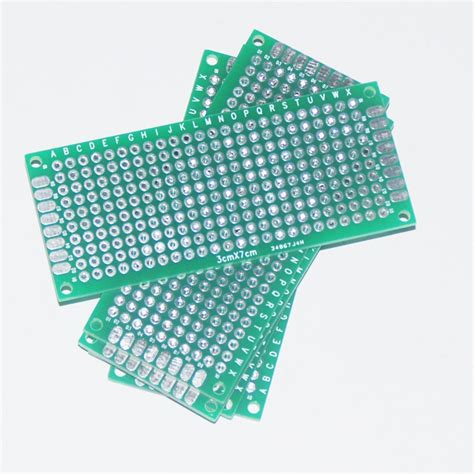
3. Perfboard
Perfboard is similar to stripboard, but instead of copper strips, it has a grid of holes. You can use wire to create the desired connections between components.
Pros:
– Allows for more customization than stripboard
– Can accommodate larger components
– Relatively inexpensive
Cons:
– Requires more wiring than stripboard
– Modifications can be difficult
– Not as professional-looking as a custom PCB
4. Wire Wrapping
Wire wrapping involves using a special tool to wrap wire around the pins of components. This method creates a secure connection without soldering.
Pros:
– Creates secure connections
– Allows for easy modifications
– No soldering required
Cons:
– Requires special tools and skills
– Can be time-consuming
– Not suitable for high-frequency circuits
5. Point-to-Point Construction
Point-to-point construction involves soldering components directly to each other without using a circuit board. This method is often used for vintage electronics and can create a unique, handcrafted look.
Pros:
– Creates a unique, handcrafted appearance
– Allows for customization
– Can be used for repairs and modifications
Cons:
– Requires soldering skills
– Can be time-consuming
– Not suitable for complex circuits
6. Etching Your Own PCB
If you have access to the necessary equipment, you can etch your own PCB at home. This process involves transferring your circuit design onto a copper-clad board and then using chemicals to remove the unwanted copper.
Pros:
– Allows for complete customization
– Can be cost-effective for small quantities
– Provides a professional-looking result
Cons:
– Requires specialized equipment and chemicals
– Can be time-consuming
– Requires knowledge of PCB design software
7. PCB Milling
PCB milling involves using a computer-controlled machine to remove copper from a PCB based on your circuit design. This method is faster than etching and can create more precise traces.
Pros:
– Faster than etching
– Creates precise traces
– Allows for customization
Cons:
– Requires access to a PCB milling machine
– Can be expensive for small quantities
– Requires knowledge of PCB design software
8. 3D Printing
While not a traditional method for creating PCBs, 3D printing can be used to create custom enclosures and mounts for your electronic components.
Pros:
– Allows for complete customization of enclosures
– Can create complex shapes and designs
– Relatively fast and inexpensive
Cons:
– Not suitable for creating the actual PCB
– Requires access to a 3D printer
– May require knowledge of 3D modeling software
9. Using a PCB Prototyping Service
If you don’t have the equipment or skills to create a PCB prototype yourself, you can use a PCB prototyping service. These services will manufacture your PCB based on your design files.
Pros:
– Professional-quality results
– Fast turnaround times
– No need for specialized equipment or skills
Cons:
– Can be more expensive than DIY methods
– Less control over the manufacturing process
– Requires knowledge of PCB design software
10. Outsourcing to a PCB Manufacturer
For larger quantities or more complex designs, outsourcing your PCB prototype to a professional manufacturer may be the best option. Many manufacturers offer prototyping services in addition to full-scale production.
Pros:
– Professional-quality results
– Can handle complex designs and large quantities
– Often provides additional services such as assembly and testing
Cons:
– Can be more expensive than other methods
– Longer lead times than DIY methods
– Requires knowledge of PCB design software

Choosing the Right PCB Prototyping Method
With so many options available, how do you choose the right PCB prototyping method for your needs? Consider the following factors:
- Complexity of your circuit design
- Required quantity of prototypes
- Available budget
- Timeframe for prototyping
- Your own skills and access to equipment
| Method | Complexity | Quantity | Budget | Timeframe | Skills Required |
|---|---|---|---|---|---|
| Breadboarding | Low | Low | Low | Fast | Low |
| Stripboard | Medium | Low | Low | Medium | Medium |
| Perfboard | Medium | Low | Low | Medium | Medium |
| Wire Wrapping | Medium | Low | Medium | Slow | High |
| Point-to-Point | Low | Low | Low | Slow | Medium |
| Etching | High | Low | Medium | Slow | High |
| PCB Milling | High | Low | High | Fast | High |
| 3D Printing | N/A | Low | Medium | Fast | Medium |
| Prototyping Service | High | Low | High | Fast | Low |
| PCB Manufacturer | High | High | High | Slow | Low |

FAQ
- What is the most cost-effective method for creating a small number of PCB prototypes?
-
For a small number of simple prototypes, breadboarding or stripboard may be the most cost-effective option. If you require a more professional-looking result, using a PCB prototyping service can be a good balance between cost and quality.
-
How long does it typically take to receive a PCB prototype from a manufacturer?
-
Lead times can vary depending on the manufacturer and the complexity of your design. Typically, you can expect to receive your prototypes within 1-2 weeks, but some manufacturers offer expedited services for an additional cost.
-
Do I need to have knowledge of PCB design software to create a prototype?
-
For many of the DIY prototyping methods, knowledge of PCB design software is not necessary. However, if you plan to use a prototyping service or outsource to a manufacturer, you will need to provide design files created using PCB design software.
-
Can I use 3D printing to create a functional PCB prototype?
-
While 3D printing can be used to create custom enclosures and mounts for your electronic components, it is not suitable for creating the actual PCB. You will still need to use one of the other methods to create the functional circuit board.
-
What should I do if my PCB prototype doesn’t work as intended?
- If your prototype doesn’t function as planned, first check for any obvious errors such as incorrect component placement or faulty connections. If the issue persists, you may need to modify your circuit design and create a new prototype. This iterative process is a normal part of product development.
Conclusion
Creating a PCB prototype is an essential step in the development of any electronic device. By carefully considering your needs and resources, you can choose the prototyping method that best fits your project. Whether you opt for a DIY approach or outsource to a professional manufacturer, the goal is to create a functional prototype that allows you to test and refine your design before moving on to full-scale production. With the ten methods outlined in this article, you have a range of options to bring your electronic vision to life.


Leave a Reply